Photography Basics – Aperture
Aperture is one of 3 settings, along with shutter speed and ISO, that can be used to affect the brightness (exposure) of an image. It also affects how much of the image is in focus (DoF), and how out of focus areas appear (bokeh). This article covers how the aperture setting affects exposure, DoF and bokeh, and what aperture settings to use for certain effects.
What is aperture?
The aperture is the opening in the lens that allows light through to the camera's image sensor, and determines the light rays that come to focus in the image plane. The smaller the aperture opening, the less light gets through to the image sensor, but the more of the image will be in focus.
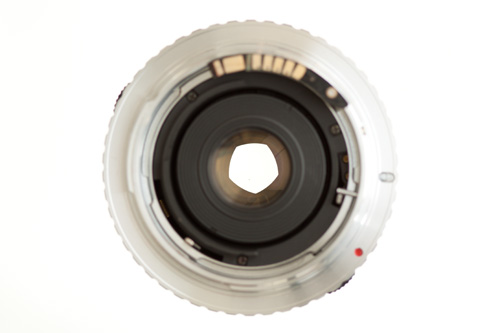
Lens with aperture partially closed
Aperture is also known as f-stops or f-numbers, and is usually expressed as the focal length divided by the aperture. For example, a lens with a focal length (f) of 50mm and an aperture of f/2 would give an aperture opening size of 50mm/2 = 25mm. The same lens with an aperture of f/8 would give an aperture opening size of 50mm/8 = 6.25mm. So, as you can see, f/2 is a larger aperture than f/8. When looking at apertures, the smaller the f-number, the larger the aperture.
The reason that aperture is expressed as an f-stop rather than an actual diameter is because it allows us to easily compare depth of field and light gathering ability across lenses of different focal lengths. A 25mm lens with an f/2 aperture (12mm physical aperture size) will let through the same amount of light and give the same depth of field as a 50mm lens with an f/2 aperture (25mm physical aperture size). The longer the focal length, the larger the diameter of the aperture will have to be for a given focal length. This is why you can't purchase a 800mm f/2 lens - the aperture diameter would need to be 400mm! That would make for a very large, heavy, and expensive lens.
Lenses are usually marketed using their maximum (largest) aperture. For zoom lenses, the maximum f-stop will usually change throughout the zoom length, and so these lenses will be marketed with their maximum aperture range, e.g. a 18-55mm f/3.5-5.6 lens means that the lens' largest aperture at 18mm is f/3.5, while at 55mm the largest aperture is f/5.6. You can purchase zoom lenses with a constant aperture, but these tend to be more expensive.
There are a few different formats that you may see used for aperture, for example, a 50mm lens with a maximum aperture of 1.4 may be written as:
- 50mm f/1.4
- 50mm/1.4
- 50mm 1:1.4
f/aperture is by far the most common way of writing an aperture value though.
The aperture setting on your camera can be changed by putting your camera into aperture priority mode (usually indicated as A or Av on the mode dial), or Manual mode (usually indicated as M on the mode dial).
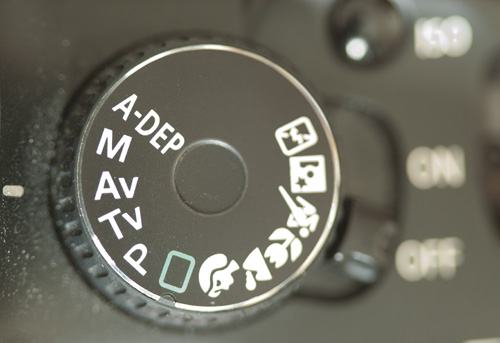
Mode dial on Canon 450D indicating camera is set to Aperture Priority mode
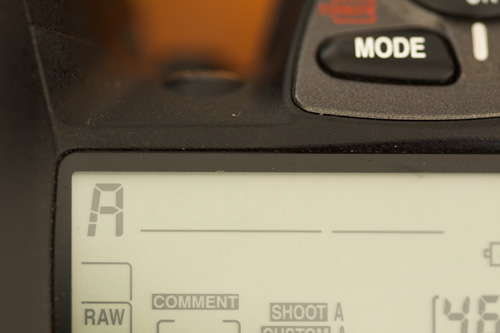
Top LCD panel on Nikon D200 indicating camera is set to Aperture Priority mode
Some lenses also feature an aperture ring that lets you set the aperture directly on the lens by turning the ring.
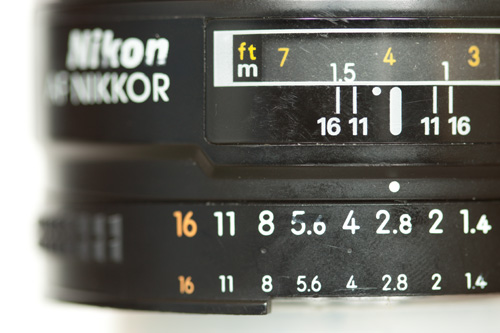
Aperture ring on Nikon 50mm/1.4 D lens
F-stops are numbered starting from 1, and then increasing by a factor of √2 (about 1.4). Each increase represents a halving of the light transmitted. Full f-stops, starting from f/1 would be: f/1, f/1.4, f/2, f/2.8, f/4, f/5.6, f/8, f/11, f/16... Aperture is not always measured in full stops, most cameras allow you to change the aperture value in 1/3 stop increments, and many lenses fall somewhere in between two full f-stop values. For example, f/1.8 is 2/3 a stop slower than f/1.4 and 1/3 of a stop faster than f/2.
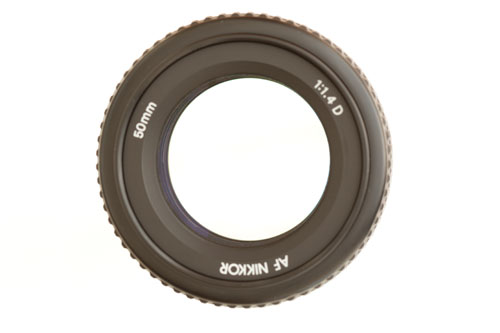
50mm/1.4 lens at f/1.4

50mm/1.4 lens at f/2
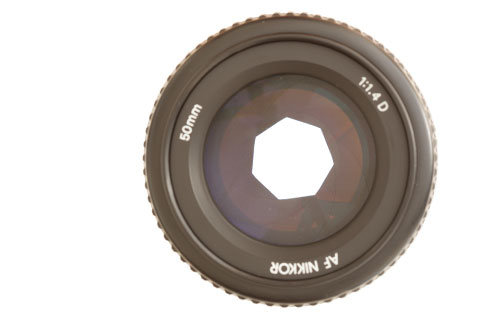
50mm/1.4 lens at f/2.8

50mm/1.4 lens at f/16
A larger aperture allows more light through the lens, and is known as being 'faster' than a smaller aperture - it allows a faster shutter speed. E.g. f/2.8 is faster than f/4. Lenses with large maximum apertures are also known as fast lenses. Typically these are lenses with an aperture of f/2.8 or less.
Using aperture to affect exposure
Because the aperture controls how much light your camera's sensor receives, it can be used to modify the exposure / brightness of an image, or to allow you to use a faster shutter speed or slower ISO. One stop change in the aperture value equates to one stop change of shutter speed, or one stop change in ISO value. So for an image with the same brightness, you can open your aperture by one stop to allow you to increase your shutter speed by one stop. For example, the following settings would all give an image with the same exposure:
| Aperture | Shutter Speed | ISO |
|---|---|---|
| f/8 | 1/40 | 100 |
| f/5.6 | 1/80 | 100 |
| f/4 | 1/160 | 100 |
| f/2.8 | 1/320 | 100 |
| f/2 | 1/640 | 100 |
Or you can open your aperture to keep the same shutter speed, but decrease your ISO speed:
| Aperture | Shutter Speed | ISO |
|---|---|---|
| f/8 | 1/640 | 1600 |
| f/5.6 | 1/640 | 800 |
| f/4 | 1/640 | 400 |
| f/2.8 | 1/640 | 200 |
| f/2 | 1/640 | 100 |
When photographing fast action, such as sports, you may want to use a fast shutter speed. Likewise, when shooting handheld in dimly lit conditions, you may want a fast shutter speed to prevent blur from camera shake. In both these situations it would make sense to use a fast aperture (e.g. f/2.8) to allow you to use a fast shutter speed while keeping the exposure correct. You would probably want to use a fast ISO as well in these situations.
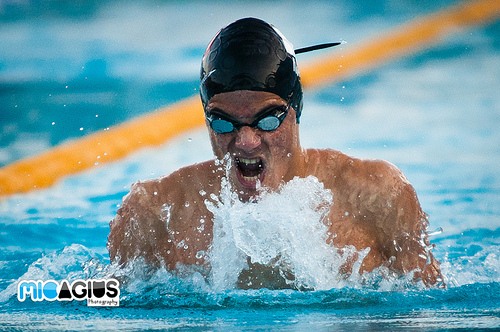
Malta International Swim Meet 2011 by Michele | Mic. Agius Photography on flickr - shot at f/2.8, ISO1250, 1/2000s (licensed CC-BY)
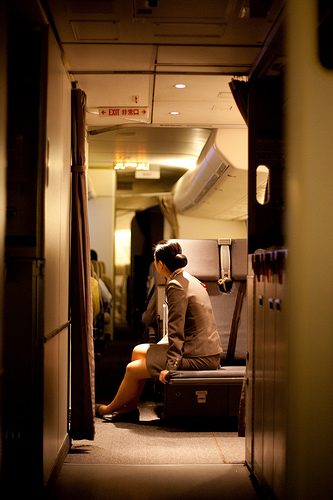
IMG_3429 by Lachy Leung on flickr - shot at f/1.4, ISO1600, 1/20s (licensed CC-BY)
In some situations you want to use as slow a shutter speed as possible, for example when trying to blur moving water. Here you would use a small aperture, e.g. f/16, along with a slow ISO e.g. ISO100.
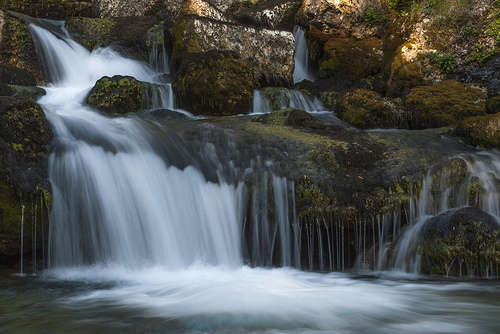
carezze by why 137 on flickr - shot at f/29, 1/4s (licensed CC-BY)
Although ISO can also be increased to allow for a brighter exposure, or a faster shutter speed, increasing the ISO can also result in image noise. And in some cases, you may already be using a high ISO, but still need a brighter exposure without dropping the shutter speed too low. So in some cases it is preferable to use a faster aperture. Unlike ISO, changing the aperture doesn't affect image noise, but it does instead affect depth of field.
Depth of Field (DoF)
Depth of Field, or DoF for short, describes how much of an image is in focus. For a given perspective, a larger aperture, e.g. f/2 results in a small depth of field (i.e. the plane of sharp focus is quite narrow), while a smaller aperture, e.g. f/8 results in a larger depth of field (i.e. the plane of sharp focus is much deeper).

DoF at f/2.8 is quite shallow - only the central portion of the image is in sharp focus
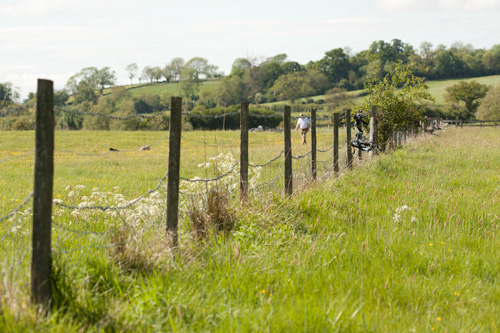
DoF at f/5.6 is larger - most of the image is in focus except for the immediate foreground and distant background

At f/11 all the image is in focus, from the nearest fence post to the trees on the hill in the background.
For images where you want to focus on a single subject and remove background distractions, such as a portrait, a large aperture that will give a shallow DoF e.g. f/2 works well.
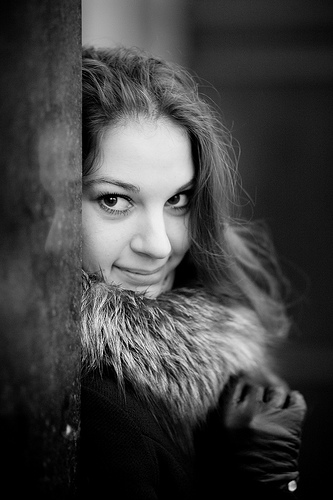
Anna by Max Khokhlov on flickr (licensed CC-BY-SA)
For images where you want nearly everything to be in focus, such as a landscape, a small aperture that will give a large depth of field e.g. f/8 works well.
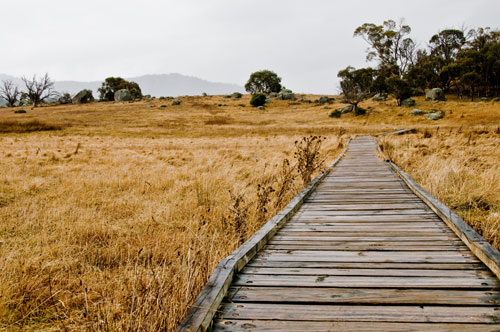
Yankee Hat by nosha on flickr
When you view an image through the optical viewfinder of a camera, the lens will be wide open. The lens is only stopped down to the aperture you have chosen on the camera when you press the shutter to take the photo. To preview the affect on depth of field the aperture will have, you will need to press the DoF preview button on your camera. This only applies when previewing the effect through an optical viewfinder - electronic viewfinders and Live View will usually automatically stop the lens down, giving you an accurate preview without you having to press a DoF preview button.
Diffraction, sensor size, and megapixels
At smaller apertures, e.g. f/22 you will find that diffraction starts to cause your image to loose detail. So although very small apertures like f/22 can be used to get a very large depth of field, they are generally best off avoided. An aperture such as f/8 or f/11 will usually give a large enough depth of field to be acceptable, and avoid softening due to diffraction.
It is important to note that f-numbers only relate to the focal length and aperture of the lens. They do not take into account the size of the camera's sensor the lens is used with. So a lens used on a full frame sensor camera will give less depth of field at a given aperture than the same lens used on an APS-C sized sensor camera, when both are arranged for the same composition.
For example, depth of field at f/3.3 on a camera with a 5.6 x 4.2 mm (1/2.5") sensor is roughly equivalent to f/11 on a camera with a 22.2 x 14.8 mm (APS-C) sensor for an image taken with the same perspective:
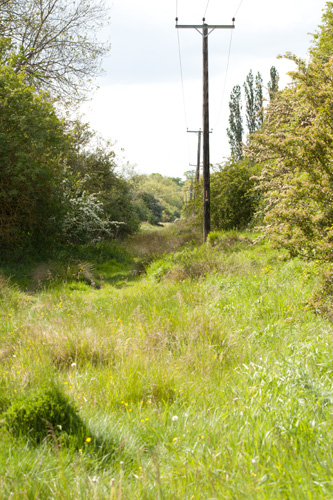
Camera with APS-C sized sensor, 150mm equiv. focal length, actual focal length 100mm, f/11
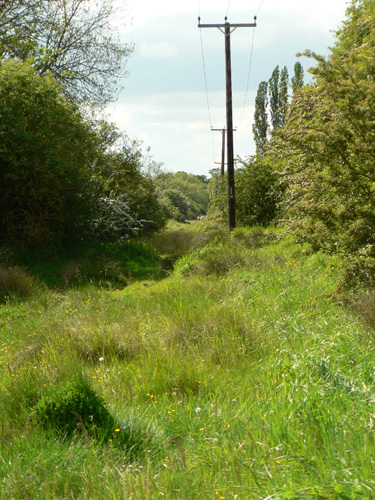
Camera with 1/2.5" sized sensor, 154mm equiv. focal length, actual focal length 26mm, f/3.3
The large crop factor of the small sensored camera compared to the larger APS-C sized sensor camera is what makes the difference here. If we take an photo with the APS-C sized sensor camera using a lens that is about the same focal length that the smaller sensored camera used for the photo above, at a similar aperture, and then crop that down to take into account the smaller sensored camera's crop factor, then we end up with a very similar depth of field:
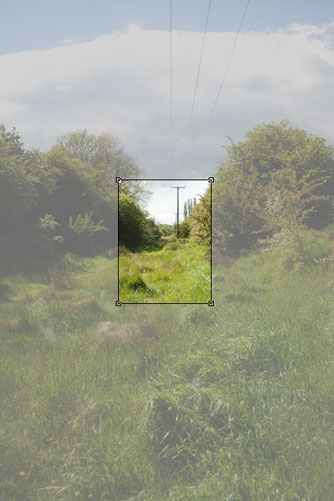
Camera with APS-C sized sensor, 38.4mm equiv. focal length, actual focal length 24mm, f/2.8, showing crop size of 1/2.5" sensor
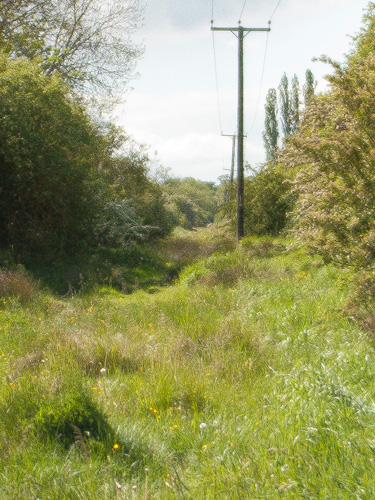
Camera with APS-C sized sensor, 38.4mm equiv. focal length, actual focal length 24mm, f/2.8, cropped down to size of 1/2.5" sensor
As well as the differences in DoF, you should note that diffraction will occur earlier with a small sensored camera. So while you might use f/16 on a full frame camera for a large depth of field, for a 4/3 camera (sensor is half the size of full frame), f/8 would give the same depth of field. If you used f/16 on a 4/3 sensored camera, you would likely get quite a bit of diffraction softening, while diffraction wouldn't be very evident at f/16 on a full frame camera.
Another thing to take into account is the number of megapixels your camera has, and how large you intend to print / view your image at. A 10MP camera with an APS-C sized sensor will show little effects of diffraction when shot at f/11 and the image is viewed at 100%. But a 20MP camera with an APS-C sized sensor shot at f/11 will show greater diffraction softening when the image is viewed at 100%. So the optimum aperture for a higher MP camera is less than for a lower MP camera. Of course, if you print both images to the same size print, the image from the 20MP would be better quality.
Bokeh
Bokeh is a japanese word that refers to the way out of focus areas are rendered in am image.
Busy bokeh:
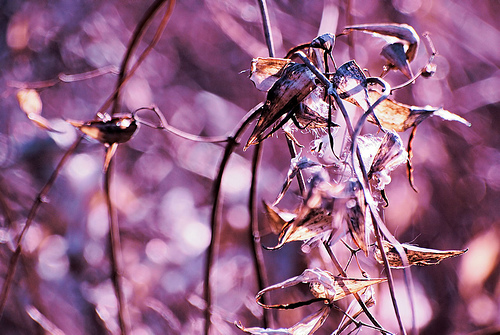
natures tinsel by Grant MacDonald on flickr (licensed CC-BY-NC)
Smooth bokeh:
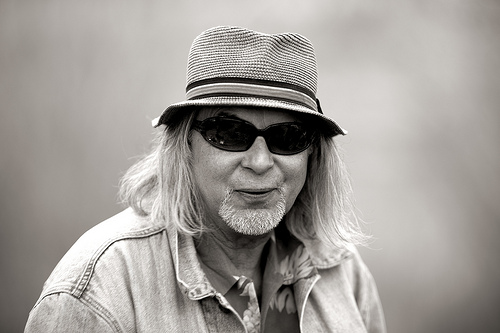
Bokeh Canon!!! by Darren Kirby on flickr (licensed CC-BY-SA)
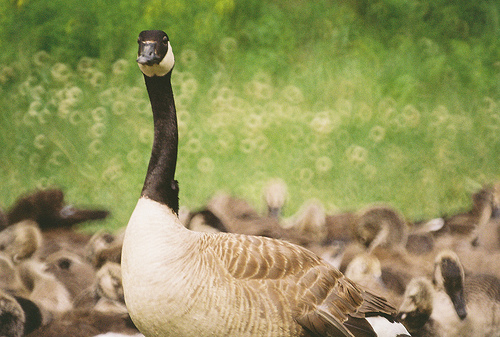
Lookout by Andrew Butitta on flickr (licensed CC-BY-SA)
The aperture of a lens determines how out of focus areas (bokeh), are rendered. Generally the more aperture blades a lens has, the more rounded the out of focus areas will be. Many lenses also feature rounded aperture blades, which help create a more pleasing bokeh.
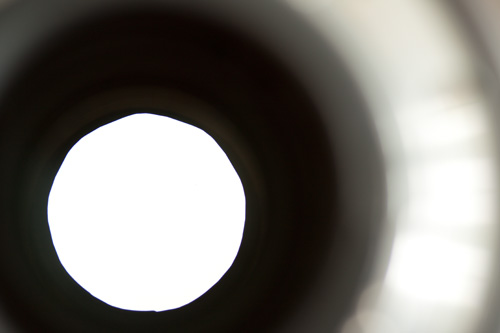
A lens with a 9 bladed aperture and the blades rounded produces an almost circular aperture, and pleasing bokeh in photos taken with the lens
Focusing in dim light
As well as allowing more light through to the camera's sensor, a large aperture makes it easier to see through your camera's optical viewfinder in dim light. The way most optical viewfinders are constructed means that for apertures larger than f/2.8, the amount of light that reaches your eye does not change. But for apertures smaller than f/2.8, it can make quite a difference.

Viewfinder with f/1.4 lens

Viewfinder with f/2 lens

Viewfinder with f/2.8 lens

Viewfinder with f/4 lens

Viewfinder with f/5.6 lens

Viewfinder with f/8 lens
Many cameras also have special autofocus sensors that work only with lenses that have a maximum aperture of f/2.8 or larger. So a lens with a large maximum aperture (e.g. f/2.8) will be easier to see through in dim light, and will also help your camera's autofocus system to focus quickly and accurately.
Vignetting
Most lenses will exhibit some vignetting. This is where the corners and edges of the image are darker than the center. Vignetting will usually be most pronounced with the lens set at its largest aperture, and will disappear as you stop the lens down. Usually closing down the aperture a couple of stops will be enough to eliminate vignetting.

Vignetting with aperture wide open at f/1.4

With the lens stopped down to f/2.8 the vignetting disappears
Although using a lens wide open can cause vignetting, most photo editing software can easily remove vignetting, so don't think you must stop a lens down to prevent vignetting. Likewise, if you like the vignetting effect, you don't have to use a lens wide open, and can instead add a vignette to the photo on the computer.
Cost, weight, and size
While having a lens with a fast aperture gives you more creative possibilities, allowing you to shoot in lower light / use a faster shutter speed / use a shallower depth of field, the faster a lens, the more it will cost.
| Lens | Approx cost | Weight (g) | Dimensions (mm) |
|---|---|---|---|
| Canon 50mm f/1.8 | $131 / £96 | 130 | 68 x 41 |
| Canon 50mm f/1.4 | $498 / £355 | 290 | 74 x 51 |
| Canon 50mm f/1.2 | $1,699 / £1,405 | 544 | 156 x 138 |
| Leica 50mm f/0.95 | $10,000 / £7250 | 700 | 73 x 75 |
As you can see, you pay more and more for each small gain in maximum aperture. The larger aperture lenses will also be larger and heavier than smaller aperture lenses. If you would like to experiment with shallow DoF, a 50mm f/1.8 lens makes a reasonably cheap introduction to the world of fast primes. You can also purchase many older lenses with large maximum apertures quite cheaply on ebay.
Along with shutter speed, ISO, and focus, aperture is one of the most important settings available on your camera. Hopefully you now know how the different aperture settings affect how a photograph will look, and also what differences the aperture can make if you are looking to buy a lens for a DSLR.


