An Introduction To Infrared (IR) Photography
Infrared (IR) photography allows you to turn a simple shot into an other-worldly scene. Plants and trees turn bright white, while skies and water darken considerably.
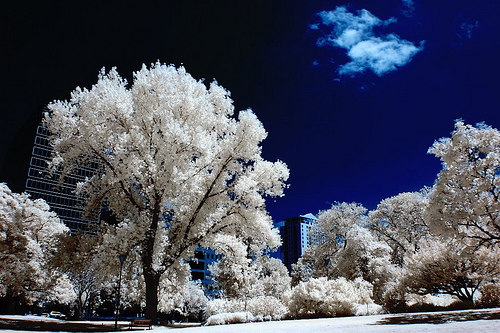
summertime blues by mugley on flickr (licensed CC-BY-SA)
The sun puts out a lot of infrared light, as well as visible light. By using a camera that is sensitive to infrared and a filter that blocks the visible light, we end up with an infrared photo.
We are not talking about taking photos with cameras that are sensitive to infrared heat radiation, like police helicopters use to find people hiding at night. But rather, photos taken using what is technically termed as near infrared light. This infrared light is reflected from objects, just like visible light, but we can't see it.
Since we can't see infrared light, the world in infrared looks very different. Most plants and trees reflect a lot of infrared light, which is why they look so bright in infrared photos. Water and the sky does not reflect much infrared light, and so they appear much darker.
To take an infrared photo, you'll need a camera that is sensitive to infrared light, and a filter that passes infrared light while blocking visible light.
Cameras suitable for infrared photography
Nearly all digital cameras come with a built-in infrared blocking filter. However, on some older models, this filter was not very strong, and so still let through some infrared light.
You can test if your camera is sensitive to infrared light by taking a photo while pointing a TV remote at the camera lens. TV remotes use an infrared LED to send an infrared signal to the TV. So by pressing a button on the remote while pointing it at the camera, the remote will emit infrared light.
Take the photo in a dark spot, so it will be clear if the camera is picking up infrared light from the TV remote.
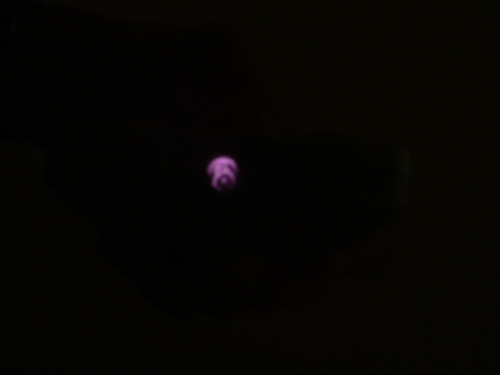
The camera that took this photo is clearly sensitive to IR light as it has picked up the light from the TV remote's infrared LED
If your camera is not sensitive to infrared light, you can purchase infrared cameras, or have an existing camera modified to shoot infrared. A well known company that converts existing cameras to infrared is Life Pixel. The cost of conversion is around $250.
You can find cameras already converted to infrared for sale on eBay, for example from the seller Digital Landscapes. Alternatively, you can purchase an old camera that has not been converted, but is still sensitive to infrared light. Popular cameras are the Nikon D70 and some of the old Sony Cybershot models.
Sigma DSLRs are particularly suitable for infrared photography, as they feature a user removable infrared cut filter. The camera can easily be converted back to a normal camera by just putting the infrared cut filter back again.
Converted IR vs. Full spectrum vs. IR sensitive
There are some differences between a camera that is sensitive to infrared light, one that has been converted specially for infrared photography, and one that is a full spectrum camera.
Full spectrum cameras
A full spectrum camera is one that has no blocking filters installed, and so captures ultraviolet, visible, and infrared light. This means it can be used for ultraviolet photography, normal (visible light) photography, and infrared photography when used with the appropriate filter.
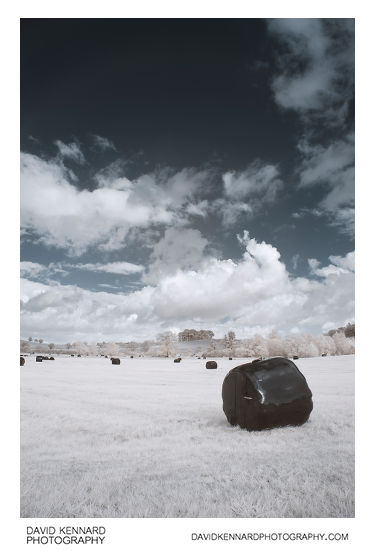
Black plastic wrapped haybales in infrared by David Kennard Photography
But you need to fit the correct filter to the front of the camera's lens to block the wavelengths of light you don't want to capture, while passing the wavelengths of light you do want to capture. So for capturing infrared photographs, you would need to purchase an infrared filter, and mount it in front of the camera's lens.
The main problem with this is that there is an additional expense of the infrared filter. If the camera uses a through the lens optical viewfinder (most DSLRs), then you won't be able to see anything through the viewfinder with an infrared filter attached.
Converted infrared cameras
With a converted infrared camera, the infrared cut filter which is normally attached in front of the sensor, is removed. In its place is put a visible light cut and infrared pass filter.
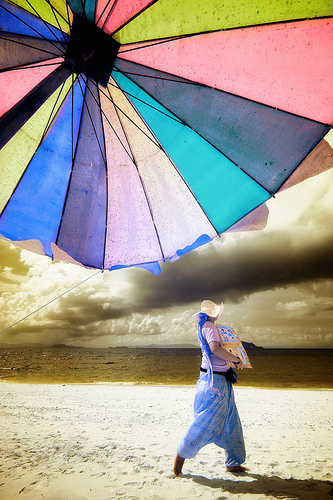
Iridescent. by digitalpimp. on flickr (licensed CC-BY-ND)
The benefit of this is that you don't need to use any additional infrared filters in front of the camera's lens, as the filter is already installed in the camera. For cameras with through the lens optical viewfinders, it means the viewfinder is not affected at all. So you can still see through the viewfinder as you did before.
The disadvantage is that you can't change the filter. (We'll come on to different strengths of infrared filter a bit later). The camera becomes a permanent infrared camera, and can't be used for anything else.
Infrared sensitive cameras
Infrared sensitive cameras are those that have an infrared cut filter installed, but the filter isn't very strong and still lets some infrared light through. They are not modified in any way.
The disadvantage of these cameras is that because they have the infrared cut filter still installed, they are not as sensitive to infrared light as a full spectrum or converted infrared camera. You will need to use longer shutter speeds to gather enough light, and probably require a tripod.
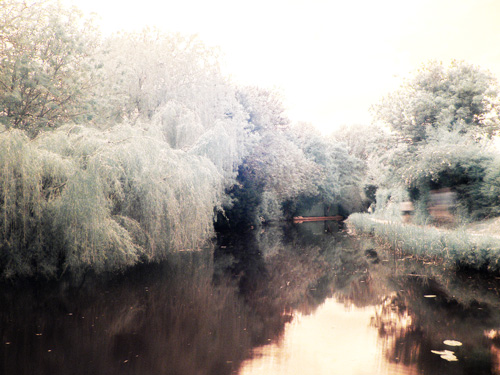
The other problem is the same as with full spectrum cameras - you need to attach an infrared filter to the front of the lens to record infrared photos. This means that you can't see through the viewfinder with an IR filter attached when using a camera with a through the lens optical viewfinder.
The good point is that the camera can be used as a normal camera with no extra filters needed. If you already have a camera that is sensitive to infrared light, this is the cheapest way to get into infrared photography since it only requires an infrared filter.
Infrared filter types
Light is a form of electromagnetic radiation, and is measured by its wavelength in nanometers. Visible light is around 400 nm (purple) to 750 nm (red). Cameras sensitive to infrared light are normally sensitive to light up to around a wavelength of 1000 nm.
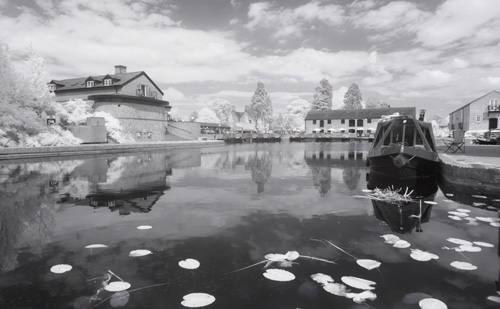
For capturing infrared photographs, there are filters that have various cut-off points. Some filters capture only infrared light (above 750 nm), while others capture some visible and infrared light. Those that pass infrared light only cannot capture any color (since we can't see infrared), so are used to produce black and white images.
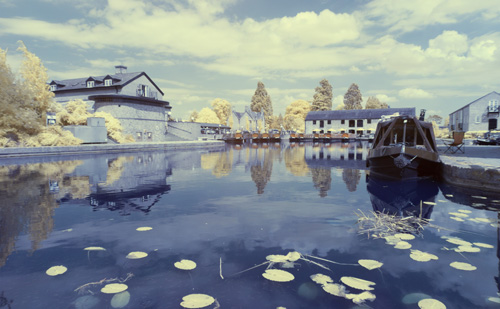
Infrared filters that let through some visible red light as well can be used to produce false color infrared photos. This is usually done by swapping the red and blue channels of a photo using photo editing software.
Probably the most popular filters for infrared photography are those that cut visible light below 720 nm. This produces a photo captured with a portion of visible red light, but mostly infrared light. An example of an infrared filter that cuts visible light below 720 nm is the Hoya R72 filter.
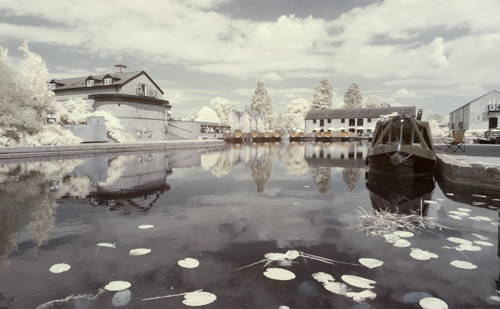
A red 25A filter cuts light with a wavelength shorter than 580 nm. This produces images with more visible red color, which allows for stronger colors in the captured image.
A pure infrared filter, like the B+W 093 blocks all visible light. These filters typically only transmit light with a wavelength longer than 800-900 nm. Because they capture no color information, they are good for strong black and white infrared photos.
What makes a good infrared photograph?
The same guidelines that apply to standard photography also apply to infrared photography. Look for a good composition, and make sure your subject is clear.
There are some differences though. The contrast between subjects can be quite different in infrared. Plants by water can create a strong contrast (white foliage against dark water). Clouds also really pop out against the dark sky in infrared photos.
For this reason, shots of rivers and lakes can work very well in infrared. Sunny days where fluffy clouds float across the sky are also very good for infrared photography.
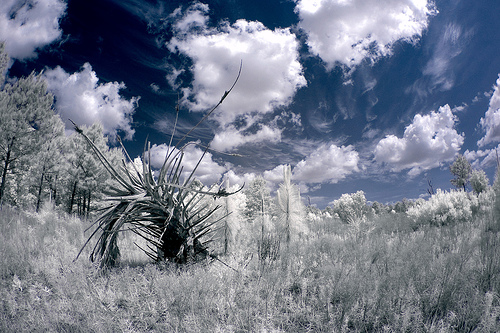
Reach by Kyle May on flickr (licensed CC-BY)
Unlike normal photography, sunrise and sunset are not particularly special (they're not bad either though). Shooting during the harsh light of the middle of the day is fine for infrared photography.
Infrared photos of people can also be quite interesting. Skin takes on a much paler tone, with very little color.
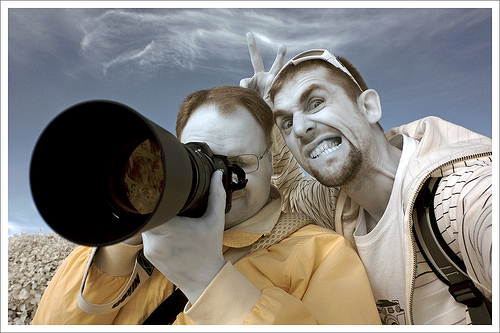
Group IR portrait! by Mad Wraith on flickr (licensed CC-BY)
How to process a false color infrared photo
An infrared photo that includes some color information will normally appear quite red. To create a false color infrared photo, with a blue sky, you can switch the blue and red channels. This process is described in the video below:
Switching the color channels relies on the Channel Mixer tool. This is included with most image editing software, but is missing from Photoshop Elements. If you use Photoshop Elements, you will need to download and install the Channel Mixer as an add-on. It can be downloaded for free as part of Grant's Tools from the Photoshop Elements and more website.
Infrared photography may not be to everyone's taste, but it does give you a chance to show the world in a different light (literally). If you want to give it a try without spending on a converted camera, I would suggest testing any old digital cameras you have to see if they are IR sensitive.
Then find a red filter (a piece of red cellophane may do in a pinch), and see how the photos come out. If you find yourself enjoying shooting in infrared, then you can save up for a proper converted infrared camera.


