How to get a white background and properly exposed subject with only one light
Clean white backgrounds can work well for some images, particularly product photography. There are two different ways that a white background is normally achieved:
- Aiming a light at the background so the bright light bounces back off the background.
- Using a semi-transparent background, and placing a light behind the background to shoot through it.
However, there can be a bit of a problem if you only have one light to work with. If you use your light to blow out the background to pure white, then how are you going to light your subject? And vice versa if you use the light to light your subject.
Thankfully Photoshop (or most other image editing programs) can come to the rescue.
The trick involves taking two photos, one where you use your light on the background, and another where you use it to light the subject. Then both photos can be combined into one where both the subject and background are lit as desired.
This technique works well with static subjects, since they won't move between the two images. The images both need to be aligned, so it probably won't work too well with living models.
So, to start off, here are the two photos I am going to work on. I used a sheet of white card curved up against the wall, and placed the toy on a sheet of white acrylic, which gives a reflection.
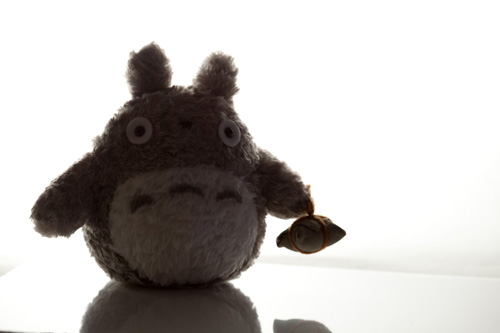
For this photo the light (a speedlight flash) was pointed at the background. The flash power was set high enough so as to blow out the background pure white. (Check the camera histogram and highlight warning).
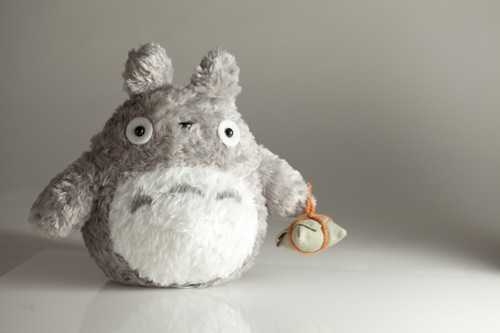
In this photo the light was pointed at a piece of white polystyrene to the right, to bounce the light back at the subject and produce softer lighting than direct light.
Feel free to save the images above and work along with the tutorial. This is the final image we'll be working towards:
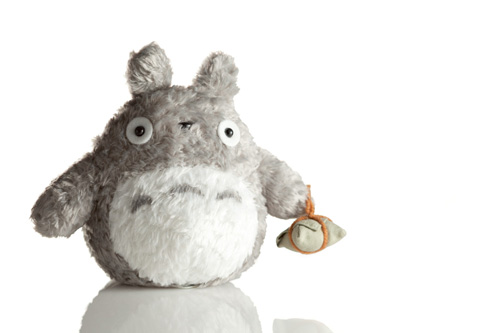
Final image after adjustments in Photoshop
Take both your photos and open them in your image editing software. For this tutorial I'll be using Photoshop Elements. The general process of editing the photo is the same for other software, though command names etc. might be a bit different.
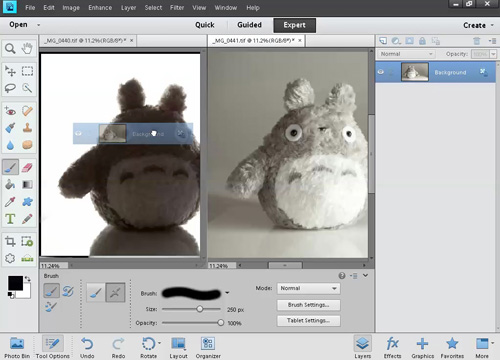
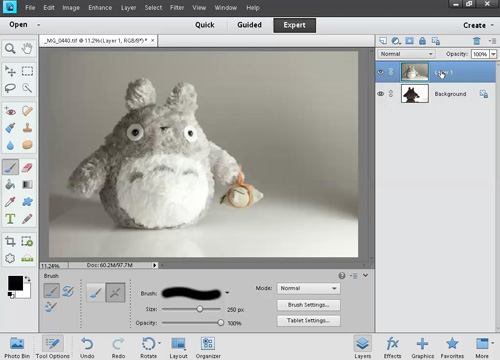
After opening the photos, go to Window > Images > Tile. This lets you see both your photos side by side. In the layers palette, click on the background layer. Hold down the shift key, and drag the layer into the other image.
Drop the layer into the image, so you now have an image that contains both photos. You can now close the other photo that the layer was dragged from.
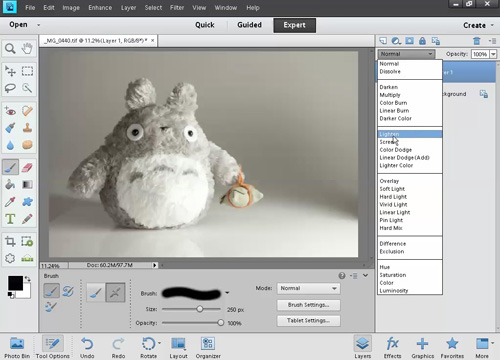
Change the blending mode of the top layer to 'Lighten'.
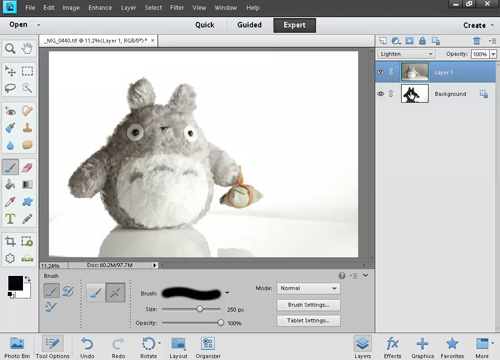
The lighten blend mode means that the only parts of this layer that will show are those that are lighter than the image below. The grey background is not lighter than the layer below, so it does not show up. The toy is lighter than the layer below, so it does show up.
With this particular image, we need to do a little more work to finish it off. The edge of the acrylic the toy is sitting on is visible, and the bottom right corner of the image isn't pure white.
To brighten these areas, we'll use a combination of painting over them with white, and a selective curves or levels adjustment. To paint with white, you can either:
- Create a new layer and then paint on it with a white brush.
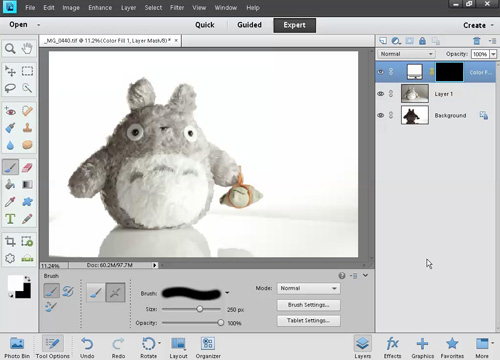
- Create a new (white) color adjustment layer, and then paint the color in using the layer's layer mask.
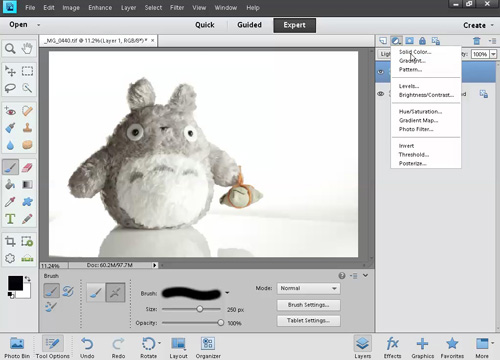
For this tutorial I'll use the second method, but I don't believe one method is better than the other. Add a Solid Color adjustment layer, and choose white as the color.
We want to paint in the effect, so fill the layer mask with black. Since black is my background color, I can do this by pressing Ctrl + backspace on the keyboard. Alternatively, you could just press Ctrl + I to invert the mask.
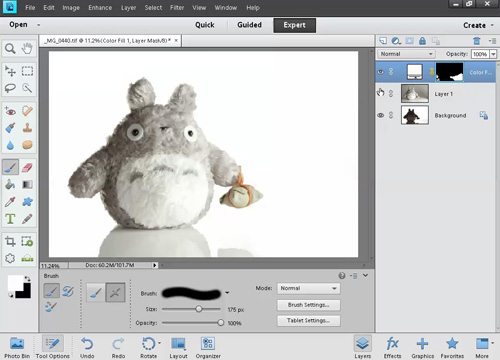
Use a soft white brush, and paint on the layer mask to show the effect of the solid color adjustment layer. (See How to use Photoshop Layer Masks for more information on working with layer masks). After painting over the areas of the image that weren't white, you should have something like below.
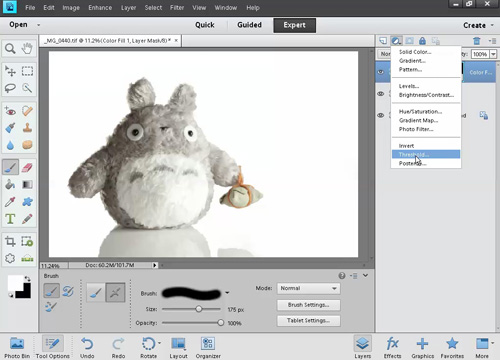
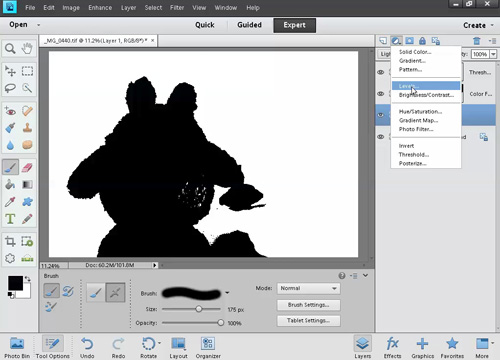
To aid in checking whether whether you have missed any areas that should be white, you can use a threshold adjustment layer.
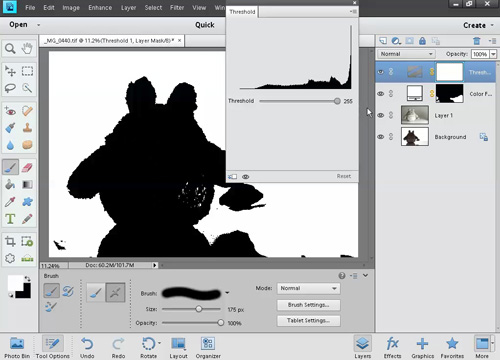
The dialog for the threshold adjustment has a slider that you can move left or right along a histogram of the image. Any areas at or to the right of the slider will appear white, while any areas to the left of the slider will appear black.
By setting the slider all the way to the right, any areas of the image that are not pure white will appear black. This makes it easy to see the areas that need brightening.
The areas that are not near the toy you can just paint in using the white solid color layer's layer mask. The areas near the toy and its reflection will not be so easy to accurately paint white over. Instead we can use a levels or curves adjustment to bring the white point in over these areas.
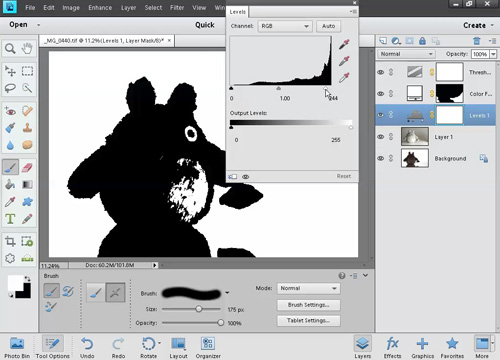
Photoshop Elements does not support curves adjustment layers, so we'll use a levels adjustment layer.
In the levels dialog, bring the white point in until all the areas that you want white in the final image are appearing as white with the threshold layer visible. Don't worry about areas of the toy also becoming blown out white - we will use a layer mask to keep the effect to only where we need it.
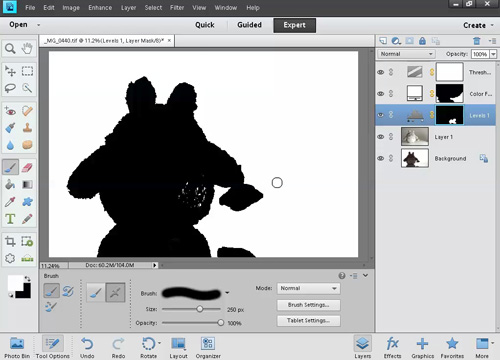
Fill the layer mask of the levels adjustment layer with black to hide the effect of the layer. Then paint in (using white) the effect just over the areas where it is needed.
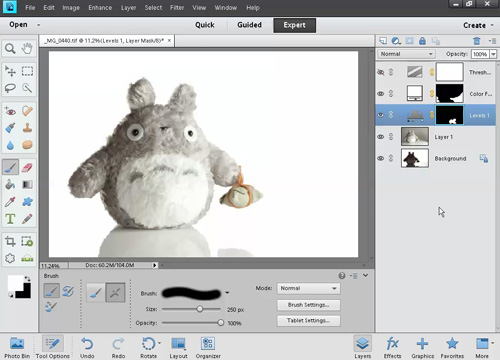
Now the image with the threshold adjustment visible looks good - all the image is blown out pure white except for our subject and the reflection. You can hide (click the little eye icon next to the layer in the layer palette) or delete the threshold adjustment layer, and you should be left with the final image like below.


Excellent tutorial! Love it! I am a beginner at this hobby of mine and these types of tips/techniques with a step by step process is great!
Thanks Pro! Glad it was useful.