How to use Exposure Compensation
Exposure compensation is a handy feature built into most cameras that allows you to adjust the exposure when taking a photo. Applying positive exposure compensation results in a brighter image, while negative exposure compensation will give a darker image.
Although cameras often get the exposure right in automatic shooting modes, sometimes an image can turn out too bright or too dark. By adjusting the exposure compensation and taking another shot, you can get an image that is exposed just how you want it.
Exposure compensation is used to adjust the exposure above or below what your camera's exposure meter thinks the exposure should be. It works in your camera's automatic and semi-automatic shooting modes, that is:
- Program mode (P)
- Aperture Priority mode (A or Av)
- Shutter Priority mode (S or Tv)
Exposure compensation will make the image brighter or darker by adjusting the exposure variable that you are not controlling. (For more about exposure and how aperture, shutter speed, and ISO work together see Photography Basics – Exposure).
So, in Program mode, exposure compensation will adjust both the shutter speed and aperture to make the image brighter or darker. In Shutter priority mode, it will adjust the aperture (up to the point where the aperture is wide open or fully closed down, and it can't be adjusted any more). In Aperture priority it will adjust the shutter speed.
Here are a series of photos shot in Aperture Priority mode that show exposure compensation in action. The images were shot with the same aperture and ISO settings, and the camera automatically varied the shutter speed based on the exposure compensation applied.
-

This first photo has no exposure compensation applied, and the camera automatically selected a shutter speed of 1/200s. -

This photo has -1 stop of exposure compensation applied. The camera automatically selected a shutter speed of 1/400s (one stop faster than 1/200s), resulting in a darker image. -

This last photo has +1 stop of exposure compensation. The camera automatically selected a shutter speed of 1/100s (one stop slower than 1/200s), resulting in a brighter image.
If you have auto ISO switched on, then exposure compensation may also adjust the ISO, meaning that it can be used in Manual mode (with auto ISO enabled) as well. This feature only works in some cameras though - check your camera manual.
How to apply Exposure Compensation
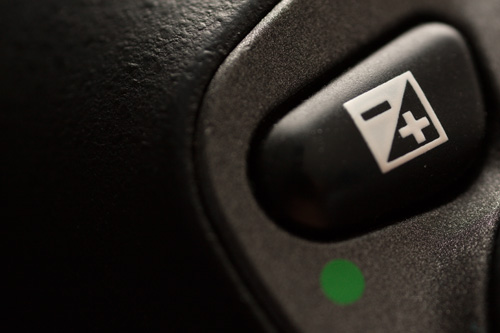
Most camera models that feature exposure compensation will have a specific exposure compensation button. It should be marked with a square cut diagonally into two. One half will be black with a white plus symbol, the other half white with a black minus symbol. (See the image at the start of this article for an example).
It is usually a case of holding down this button and then turning a control dial or wheel to choose the amount of exposure compensation that you want.
Turning the dial / wheel one way will apply positive exposure compensation (make the exposure brighter), turning it the opposite direction will apply negative exposure compensation (make the exposure darker). Check your camera manual for detailed instructions on how to use exposure compensation for your model.
Normally the amount of compensation will be measured in thirds of a stop. When talking about exposure, a stop is often expressed as EV (Exposure value). A stop and an EV are both the same - a doubling or halving of the exposure. See Photography Basics – Exposure for more information.
For each click that you turn the dial, it will add (or remove) one third of a stop of exposure compensation. So holding down the exposure compensation button and turning the relevant dial 4 clicks would apply 1.3 stops of exposure compensation.
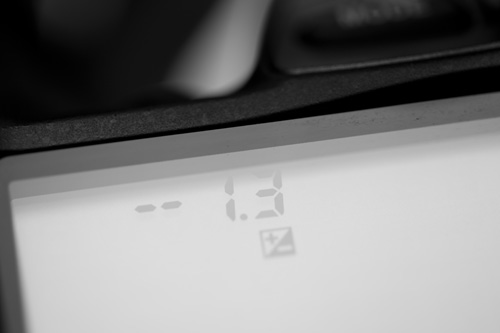
Do bear in mind that this does vary between cameras. Some cameras allow you to set the exposure spacing, so you can choose to have each click on the dial adjust the exposure one stop instead of one third of a stop.
When you set exposure compensation, the camera will indicate the amount set on the exposure scale. This is normally visible in the camera's viewfinder, or with the camera settings on the rear LCD. The exposure meter must be active (e.g. you have half pressed the shutter button) for the scale to show up.
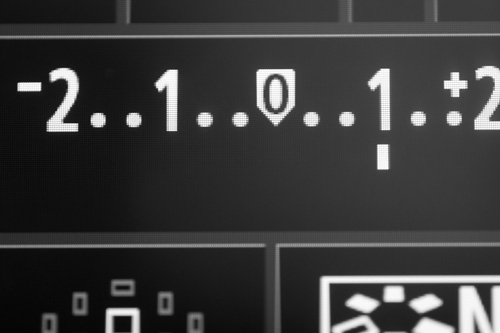
The exposure compensation applied shows as a dark bar on the scale, indicating how much has been applied. In the image above, you can see that 1 stop (EV) of exposure compensation has been applied.
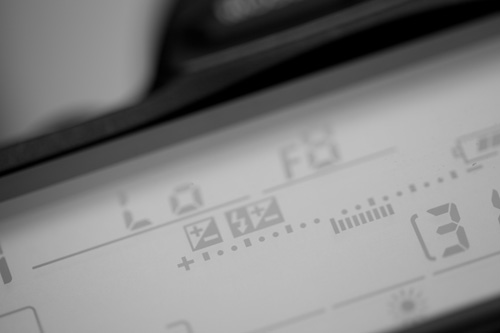
Minus 1.3 stops exposure compensation indicated on the top LCD of a Nikon Camera - note the scale is reversed compared to the other image above, which is of a Canon camera
When and how much exposure compensation to apply?
Knowing which situations will need exposure compensation, and how much will be needed is mostly a matter of trial and error. If you have a camera with an EVF, or you use the rear LCD for composing your photos, and the camera preview is accurate, then whether exposure compensation is needed or not should be obvious. (If the preview is too dark or too bright then it will be needed).
For everyone else, it is a case of taking a photo, and then checking whether the photo is too dark or too bright. If it is, then apply exposure compensation to correct it.
There are a couple of tools that can help in obtaining an optimal exposure. (Note that optimal is not the same as correct - the correct exposure is down to you and your creativity). The first is the histogram. If the histogram shows information bunched up against either edge of the chart, then exposure compensation may be a good idea. You can read more about how to understand the histogram here: Stop Exposure Problems Ruining Your Shot.
The other tool is the highlight warning tool (sometimes referred to by users as 'blinkies'. This is normally found in your camera settings for image review playback. Using this will flash the image wherever there are any blown out pure white areas in your image. So if you see part of your image flashing where you wanted to record detail, then you know to apply some negative exposure compensation to reduce the exposure.
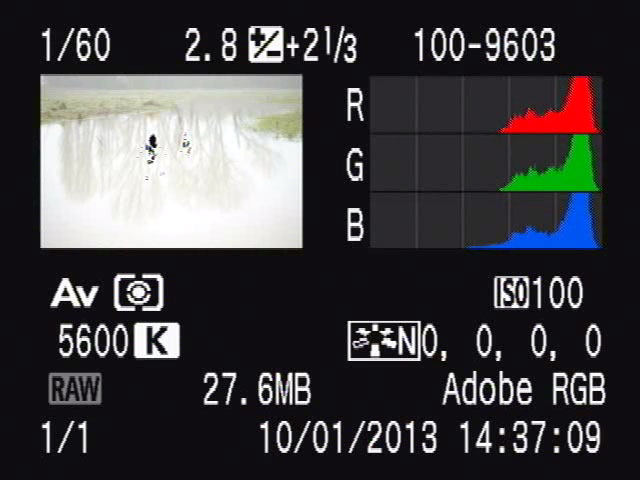
There are some situations where you are more likely to need exposure compensation. These are where you shooting subjects that are very bright or very dark. Very bright subjects could be snow, sand, and sky. Very dark subjects might be a dark rock cliff face, or someone standing in shadows where just a small amount of light is falling on their face.
The camera's internal meter will very likely choose an exposure that makes the overall tone of the photo grey. So for bright subjects you would need to apply positive exposure compensation to prevent underexposure. For dark subjects you apply negative exposure compensation to prevent overexposure.
Exposure Compensation Examples
We are shooting in Aperture priority mode, but our photos are coming out too dark. Settings are f/4, ISO100, and the camera automatically selects a shutter speed of 1/250s.
So we apply 1 stop (EV) of positive exposure compensation. This will reduce the shutter speed by one stop (to 1/125s). Then we take the photo again, and get a brighter photo.
-
We are shooting in Shutter priority mode, but the photos are coming out far too bright. Settings are 1/250s, ISO100, and the camera automatically selects an aperture of f/4.
We apply 2 stops (EV) of exposure compensation. This makes it so that the camera will now use an aperture of f/8. Take the photo again, and it will now be two stops darker and nicely exposed.
-
We are shooting in Shutter priority mode in low light, and the photos are coming out too dark. Settings are 1/250s, ISO Auto, and the camera automatically selects an aperture of f/2.8 (the largest aperture of the lens for this example).
We apply 1 stop of positive exposure compensation to make the images brighter. Since the lens is already wide open, the camera cannot adjust the aperture to make the image brighter.
We have Auto ISO on, so the camera will adjust that instead. If it was automatically selecting an ISO of 400 for our first image, then once 1 stop of positive compensation has been applied, it will select an ISO of 800 (1 stop brighter). Take the photo again and we now get a slightly noisier, but brighter photo.
Difference between using exposure compensation and Manual mode
Using exposure compensation is a bit like using Manual exposure mode. You adjust shutter speed or aperture (depending on whether you are shooting in Shutter or Aperture Priority mode), then use exposure compensation to adjust aperture or shutter speed. So why not just use manual mode?
The difference between manual exposure mode and a semi automatic exposure mode where you apply exposure compensation is that the exposure is still calculated automatically in the semi automatic exposure mode. Exposure compensation is just telling the camera to expose the photo a bit brighter or darker than it would be otherwise.
For example, let's say you are shooting snow in a forest. You take a photo in aperture priority mode, and the snow appears grey. So you add 2EV exposure compensation. This reduces the shutter speed used, so you take another photo and get a brighter photo of nice white snow.
Now you move out of the forest into the sun. A much faster shutter speed is needed here. The camera automatically adjusts the shutter speed to compensate for the increase in light, but it will still expose 2 stops brighter than it would normally, keeping the snow a nice white color.
If you used manual mode, you would have to adjust the shutter speed manually by 2 stops while in the forest to get a nice bright snow photo. Then when you move out into the sun, you then have to adjust the shutter speed again to take account of the increased light level.
Exposure compensation is just adding a bias to the camera's automatic meter reading. Manual exposure relies on you setting the correct settings for each individual image.
Flash exposure compensation
Many cameras also allow you add exposure compensation to the flash. Using this you can make your camera's flash brighter or darker. Just be careful not to get flash exposure compensation mixed up with standard exposure compensation.
If you apply some exposure compensation and then take another photo, but it looks the same as before the compensation was applied, it may be that you've accidentally set flash exposure compensation instead.
Reset after use
One last tip is to make sure that you reset your exposure compensation settings after you have finished taking any photos that require it. Otherwise next time you come to use your camera you'll wonder why it's constantly under or over exposing all the photos. (And it's even worse if you don't check the photos and discover the problem until later).
Some cameras automatically forget exposure compensation settings when they are switched off. With others, just make sure that you reset the compensation to 0 after use.
Exposure compensation can be very handy when you want to quickly adjust the exposure settings to create a brighter or darker photo. It can also be very useful if you find yourself in a lighting situation where the camera is constantly under or over exposing. Have a play with it on your camera and see how it works.


