Cropping your photos – Good or Bad?
Cropping your photos usually refers to the process of editing a photo and cutting away one or more edges of the image. There are multiple reasons why you might want to do this, such as improving the composition, enlarging the subject, or simply changing the aspect ratio of the photo.
But some photographers are dead set against cropping, preferring to get it right in-camera. In this article we'll look at both the benefits and problems with cropping an image in software. (Not to be confused with the crop factor of a camera).
How to crop a photo
First, let's look at how to crop a photo. (You can skip ahead to the next section if you already know this).
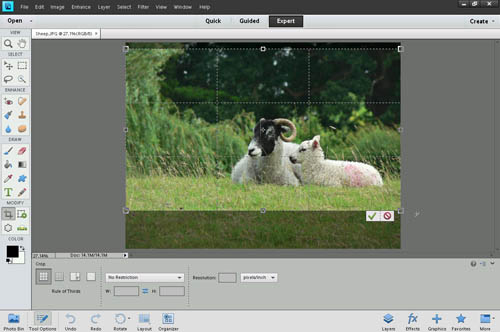
Most image editing software offers two ways to crop an image, both being pretty similar. The first is the crop tool.

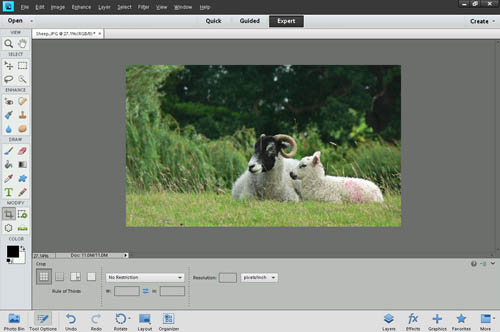
Using the tool you click and drag to create a rectangular (or square) selection around the area of the image that you want to keep. All the image area outside the selection will be removed.
Most software will let you adjust the crop area after dragging an initial selection. Double-clicking on the selection then confirms and applies the crop.
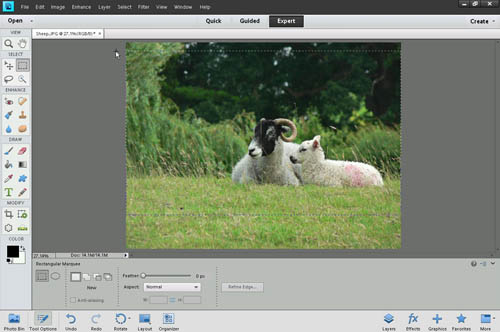
The second method is using a rectangular marquee tool. Using the tool you drag a selection of the area you want to keep.
The next step varies between software, but in the menu you should find a crop to selection item. In Photoshop Elements / CC this is Image > Crop. The image will then be cropped to the selection you made.
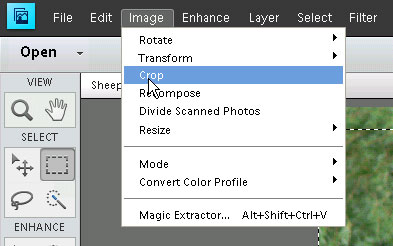
If you intend on cropping an image, I would always recommend on keeping a copy of the original image as well. You might change your mind on the crop later, or want to print at a certain aspect ratio. Having the original that you can re-crop in the future if needs be is always a good idea.
Cropping to improve composition
Cropping can be used to improve the composition of an image quite easily. If you have a subject centrally framed with space all around on them on either side, the image will often look better if you crop it to place the subject off-center. Cropping the image based on the the rule of thirds will usually (but not always!) result in a stronger image.
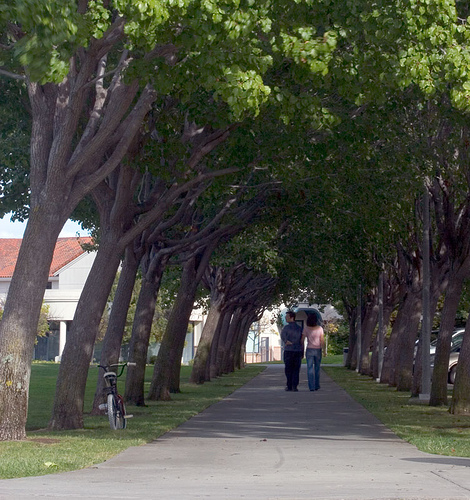
Couple by Erik Ogan on flickr (licensed CC-BY-SA)
Now, many photographers would argue that you should be composing your image correctly in-camera. And they are right to a certain extent. You should not allow the ability to crop an image later to make you sloppy when composing an image.
Cropping should not be used as crutch. How can you expect to improve your photography skills if your attitude to anything that needs adjustment is just I'll fix that later in Photoshop
.
You can easily crop in-camera by just zooming in or moving the camera.
However, there are many legitimate reasons for cropping to improve composition too. If you are using a DSLR camera and photographing in tricky conditions (e.g. moving subject or low light), then you might want to center your subject.
The central autofocus points on a DSLR camera are typically more sensitive than ones near the edge. So using the center point can provide more accurate and faster autofocus. The image can then be cropped later to a more pleasing composition.
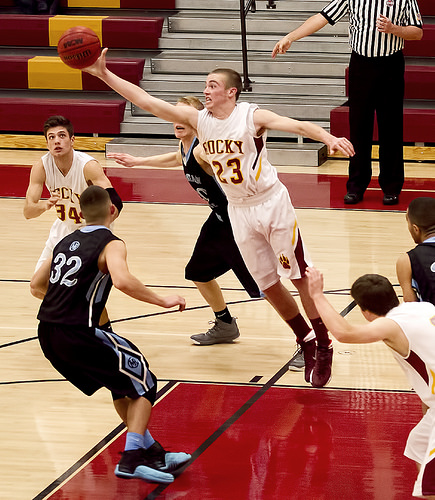
IMG_0484.closer.crop by Paul L Dineen on flickr (licensed CC-BY)
When tracking a moving object, such as a bird in flight, or a player in a sports game, it can be helpful to have them centered in the frame whatever camera you're using.
Keeping a moving object in the same place in the frame while tracking them is very difficult. Centering them gives more room around them, so you are less likely to cut part of them off at the edge of the frame. The image can then be cropped to the desired composition later.
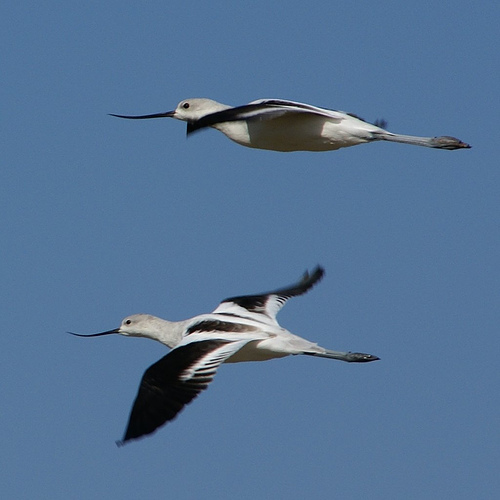
Birds Flying by David Baron on flickr (licensed CC-BY-SA)
Another reason for cropping is that there may be a problem with the composition that can't be fixed at the time of taking the shot. For example, if you have unwanted tree branches coming in at the sides or top of the image. You can hardly start cutting the branches away before you take the photo.
Using a longer focal length or moving forward with the camera might fix the problem. But this may not be possible, or it may introduce other problems. The crop tool can remove the branches with ease and no damage done to the trees.
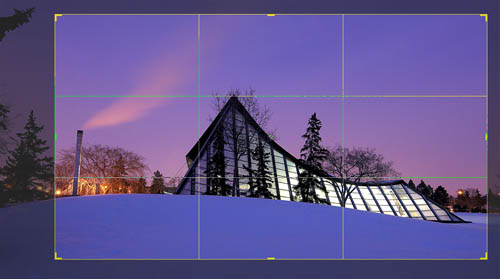
Example crop to remove branches from the edge of the frame of PHP - Wide by Darren Kirby on flickr (licensed CC-BY-SA)
An issue (especially with DSLRs again) is that what you see in the viewfinder is often not the 100% view of what the camera will capture. With DSLRs the view is normally smaller than what is captured. Rangefinder cameras can give a view wider than what will be captured, with frame lines that give a rough estimate of what will be captured.
In both cases you can end up with items near the edge of your frame that you didn't think were going to be included in the frame. Cropping the image may actually be needed to get what you saw in-camera.
Cropping to improve magnification
Along with cropping to improve the composition of a photograph, cropping to enlarge a subject in the frame is a common reason for people cropping their images.
I would suggest that if possible you try and get the magnification of your subject right in-camera. However, the reasons for cropping an image later to increase the subject size tend to be much stronger than the reasons for cropping later to improve composition.
Enlarging larger objects further away
The first reason why you might want to crop later is that you simply might not have been able to get any closer to your subject. In the instance of something far away that you can't get closer to, such as a bird, then a longer focal length lens or a teleconverter can help you get the wanted image in-camera without need for cropping.
A longer lens (for an interchangeable lens camera) lets you get closer shots of a subject. But this comes at a cost - depending on how much magnification you need, these lenses can get very expensive, not to mention big and heavy. Super-telephoto lenses popular with nature and sports photographers will typically cost you around $5,000 - $10,000.
A teleconverter on the other hand, is much cheaper. This just boosts the magnification of your camera by a fixed amount. Typically they are available in 1.4x, 1.7x, and 2x models. If you're thinking of purchasing one, make sure you check that the model you're looking at is compatible with your camera.
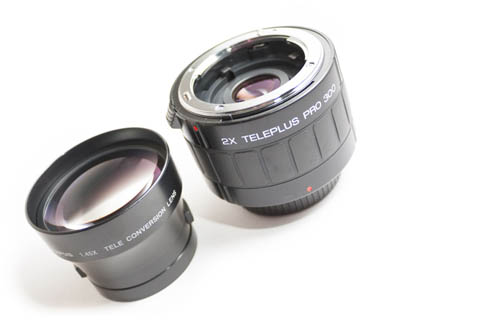
Example of two different teleconverters - the one on the left attaches onto the end of the lens and is suitable for cameras that don't have interchangeable lenses. The one on the right is designed for interchangeable lens cameras and attaches between the lens and camera.
The issue with teleconverters is that they do degrade image quality. In some cases, with cheap teleconverters, cropping an image can actually give better quality than using the teleconverter. The lower the teleconverter power, the less likely image quality is to suffer.
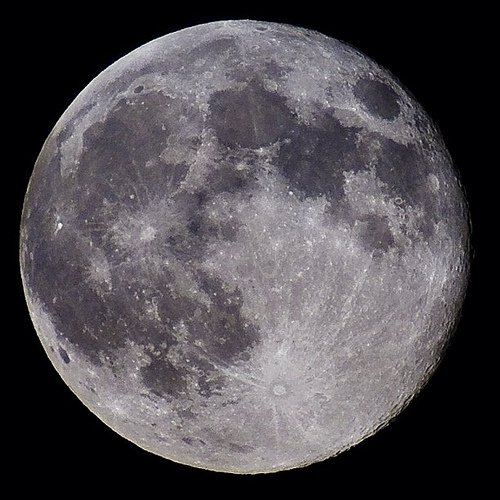
Pleine lune #FullMoon #SuperMoon #Nikon 300 mm + 1.4X teleconverter + High Speed Crop Mode = 840 mm by Jean-Pierre Magnan on flickr (licensed CC-BY)
With both using a longer lens or adding a teleconverter, the cost may be too much, or they might just not be an option for your camera. So cropping might be your only option.
Getting closer macro and close-up photos
For smaller subjects that you can get close to, you might not be able to get as close as you want. The minimum focus distance of your camera / lens might be too long to let you get any closer.
There are a number of solutions to this that can be used instead of cropping, such as using a diopter close-up lens, extension tubes, bellows, or purchasing a macro lens for an interchangeable lens camera. But all of these cost money, and might not be an option depending on your camera. In which case cropping might be the only way you can enlarge the subject in the image.
A secondary point is that cropping a macro / close-up image of a subject may give exactly the same (or sometimes even better) results than getting the magnification you want in-camera.
The reason for this is that as you move the camera nearer the subject, the shallower the depth of field becomes. So, the closer you get the camera, the smaller the aperture you will need to use to get a decent amount of the subject in focus. And in turn, the more light the camera will need to compensate for the smaller aperture setting.
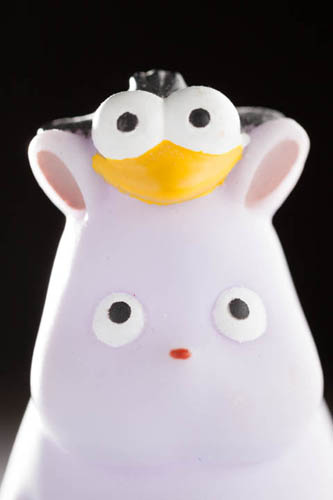
Image taken close to subject with no cropping
Image taken further away from subject, then cropped. Note the larger depth of field - the nose is now in focus and the bird's tail is in better focus too. Less flash power was used since the lens was not using as much internal extension (which introduces light loss) needed for focusing closely.
Along with this, diffraction starts to take its toll. This is the blurring of fine detail that occurs beyond certain apertures - the exact limit is dependent on your camera sensor. So getting closer may result in exactly the same image quality as you would get if you cropped the image.
The image quality by getting the camera close to the subject may actually be worse than cropping if you have to use a high ISO or slow shutter speed on an animate object due to using a smaller aperture.
Cropping to change the image's aspect ratio
There are two reasons why you might want to change the aspect ratio of an image. You might find a certain aspect ratio more aesthetically pleasing, for example using a panoramic crop for a landscape image. The other reason is for fitting the images to a desired output format.
If you want to print some 4x3″ photos, then the photos will need to be in the 4:3 aspect ratio. If the photos are intended to be used as part of a widescreen video, then you'd want them cropped in the 16:9 format.
If you intend on printing images, then when cropping an image you should bear the final output size in mind. It's no good cropping an image to 16:9 if you intend to print it at a 4:3 ratio. If you just crop an image freehand, you may well end up with a weird aspect ratio that is nearly 4:3 but not quite, meaning the image would need to be cropped again for printing.
To this end, the crop tool in most image editing software allows you to specify the aspect ratio you want. In the crop tool options you can usually choose from some pre-specified options, or enter your own ratio manually. This will then constrain the cropping selection as you drag it out to the specified aspect ratio.
Cropping for learning and experimentation purposes
Cropping an image in different ways is a great way to try out different framing options. It can help you get an idea of what works and what doesn't for different subjects. You can try changing the position of the subject from centered, to the left side of the frame, to the right side. Or change the orientation from landscape format to portrait format. Try a square crop or a panoramic crop. All without having to take any extra photos.
I would encourage you to try this in-camera too. When you find a subject you want to photograph, try moving the camera around, zoom in and out, see what works best. But with mobile subjects, then taking one image and cropping later may be more practical. Don't just stick to the 'rule of thirds'. Doing this can give you a better idea of what framings work and what don't for certain scenes.
The problems with cropping
The main issue with cropping is that you are discarding areas of the image, thus you end up with an image that is lower resolution. Is this an issue? Well, it depends on the image quality of the image in the first place, how much you're cropping by, and how large you intend to display the image.
If you're just doing a slight crop to change the composition slightly, then the resolution isn't going to be affected too badly. But if you take a phone image and crop it down by 3x, then try to get it printed poster size, you're definitely going to have problems.
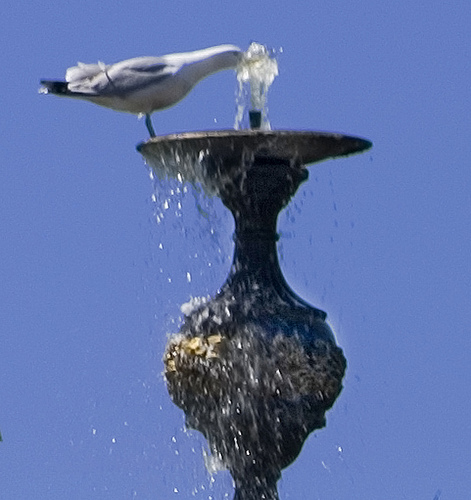
Victoria Fountain - Brian Eno Speaker Flowers Sound Installation at Marlborough House by Dominic Alves on flickr (licensed CC-BY). This very poor resolution image is a crop / detail
from this image here.
When cropping an image to enlarge a subject, you will also enlarge any image quality issues with the photo. If your focus wasn't spot on, it will be more obvious after cropping the image. Lens issues such as chromatic aberration and lens softness will also become more obvious.
Image noise, particularly if the image was shot at a high ISO setting, will also show up more when an image is enlarged by cropping. This can be combated to some extent by using noise reduction on the image.
Using cropping to fix quick shots
No-one takes perfect shots all the time. (In fact most photographers take 'okay' shots most of the time - but they only display their best ones to the world). Cropping can be a great tool to fix an image that needs a little help.
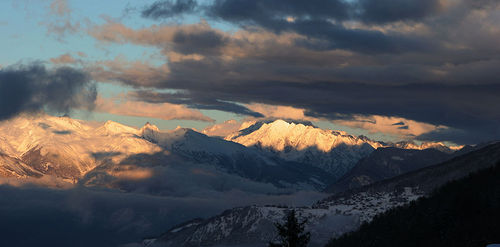
Sunset Mountains II by Sonja Pieper on flickr (licensed CC-BY-SA)
Cropping isn't 'cheating'. If an image you have taken will look better with a little cropping, then go for it. You can't always take the time to carefully frame your photo exactly right. A cropped candid portrait where the composition wasn't quite right might be better than another photo shot a few seconds later when you'd perfected the composition in-camera, but the subject has noticed you and put on their 'photo face'.
To sum up, as with many things in photography, there is no black and white as to whether you should crop your images or not. Don't use cropping as an excuse - try and get the framing right in camera if you can. But equally, don't shy away from cropping an image if it will result in a better image.


Cropping is not cheating, right! But cropping 16:9, 3:2, square, 4:3 and so on in a raw is absolutely miserable.