Guide to choosing a tripod
A tripod can be a great help in getting sharp photos and making you think more carefully about your composition. Many landscape, architecture, and product photographers would rate the tripod as being an essential bit of kit.
But if you're looking at purchasing a tripod, you may be a bit bewildered by all the different options available. In this article we'll look at the various features and specifications of tripods, and how they relate to real life use.
Deciding what you need in a tripod
Before you look for a tripod to purchase, it is important to understand what you really want from a tripod. Are you going to be walking long distances with it? Then weight is probably a strong consideration. Or will it just be used in a studio? Then the weight doesn't really matter.
Do you need it to pack up small? How much weight of equipment does it need to be able to handle? How quickly do you need to be able to set it up? How high does it need to extend? How low does it need to go? And probably the most important question, how much can you afford to spend?
When you have a good idea of what you need from a tripod, then it will make narrowing down your choice of tripod a lot easier. Of course, we'd all like a tripod that packs up tiny, extends really high while also allowing ground level shots, weighs next to nothing and costs nothing too. But that's just not realistic. So make sure you prioritize the features that are most important to you.
Look at the photography you do at the moment, and also the types of photography you'd like to do in the future to aid you with this practice. For example, if you're taking lots of low down macro and close up shots, then you'll want to make sure that any tripod you consider can go very low down to the ground.
Construction material
Tripods are typically made from either Carbon Fiber or Aluminum. You can also purchase some made from wood. The material the tripod is constructed from will affect its performance.
Aluminum tripods tend to be quite heavy. But at the same time, the heavier a tripod, the better (generally) it is at reducing vibrations. Aluminum tripods also tend to be strong, though of course this does depend on the thickness of the material used.
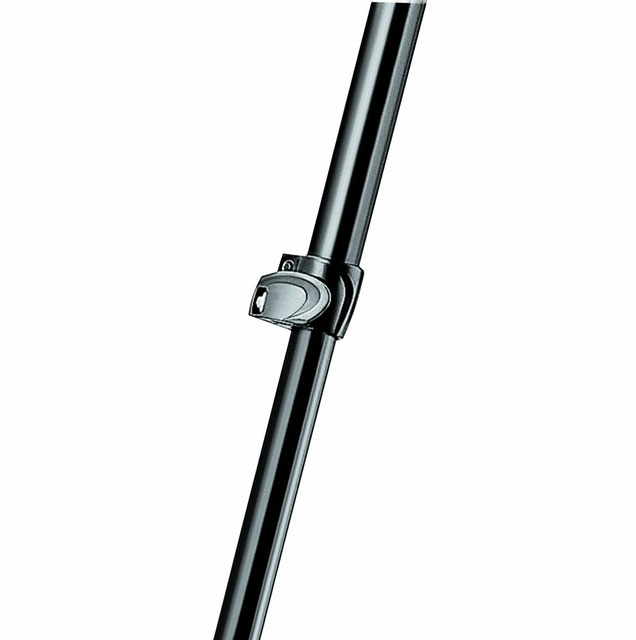
Aluminum conducts heat, which can make the tripod more difficult to handle in very cold weather. Most manufacturers include a leg muff (usually a piece of foam) around at least one of the top leg sections. This can certainly help when handling the tripod, but when extending and retracting the leg sections, it would be difficult not to touch the metal of the tripod at all.
The way aluminum conducts heat well is not a big issue for most people, but it is something to be aware of. (Especially if you live somewhere cold).
Carbon Fiber tripods are typically more expensive than Aluminum tripods, but are just as strong (or stronger) while weighing less. Carbon fiber tripods are more expensive to make, and hence cost more than equivalent aluminum models.
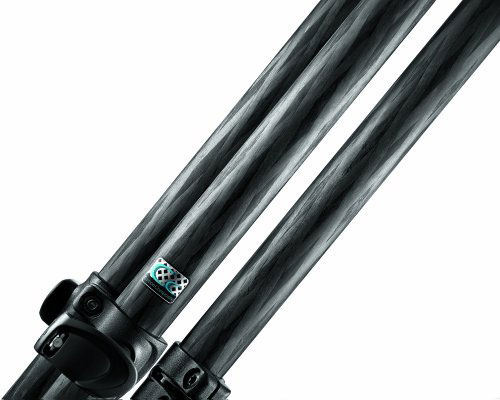
Carbon fiber does not conduct heat as much as Aluminum, though it can still become quite cold in the winter and hot in the summer. As with Aluminum tripods, most manufacturers wrap at least one of the upper leg sections with a foam muff so you don't have to touch the actual leg.
Wood tripods are few and far between, but there are some manufacturers who specialize in them (Berlebach being the main one). Wooden tripods don't pack up as small as aluminum and carbon fiber tripods, and tend to be quite expensive.
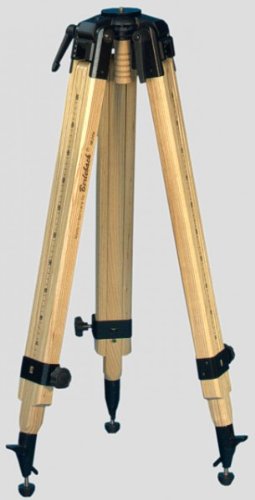
In terms of weight, they tend to be heavier than even aluminum tripods. The main selling point for wooden tripods are that they are very good at vibration dampening. While they will still get a bit cold in cold weather and hot in the sun, the effect is much less than with aluminum tripods.
Video or Photo Tripod?
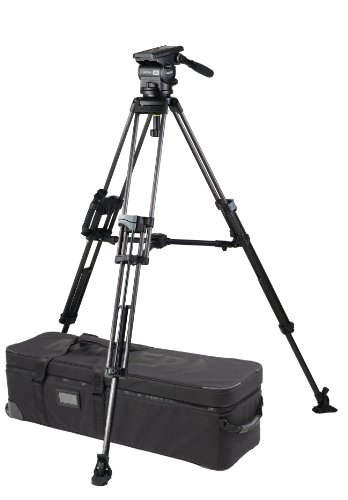
If you're doing a lot of video work with your camera, or working with a particularly heavy system, then you may want to consider a video tripod.
Video tripods tend to have wider legs, with spreaders between the legs. This gives a steadier setup than a photo tripod with its legs that are only connected together at the top.
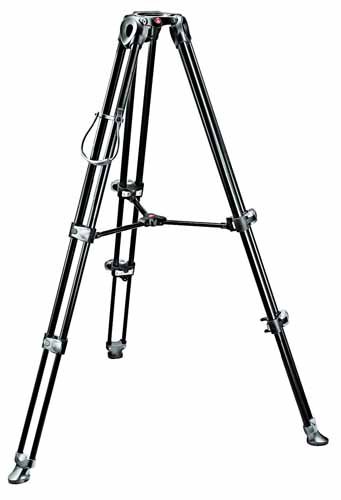
Manfrotto MVT502AM - an example of a video tripod

Gitzo GT-531 - an example of a photo tripod
However, because of the leg spreaders, the leg angles are not as adjustable as with a photo tripod. If you pick a video tripod where the spreaders are not removable, and want to get very low down to the ground you'll be out of luck.
Another difference between video and photo tripods is the mounting plate on top. Photo tripods have a screw thread on top, while video tripods often have a bowl. This bowl can vary in size, being 65mm, 75mm, or 100mm (depending on the size and load carrying ability of the tripod).
A video tripod may come with a 3/8″ half ball adapter, so you can mount any head designed for photo tripods on it. However, you won't be able to mount video heads with bowl mounts on a photo tripod. Similarly, you won't be able to mount a head designed for a 75mm bowl on a tripod with a 65mm bowl either.
For the vast majority of photographers, a photo tripod is going to be a better choice due to the better flexibility of leg positioning, and more choices in terms of size and weight.
Sturdiness / Weight bearing ability
The weight bearing ability of a tripod is one of the most important points to look at. You want to make sure that the tripod can handle the heaviest load you are likely to use with it.
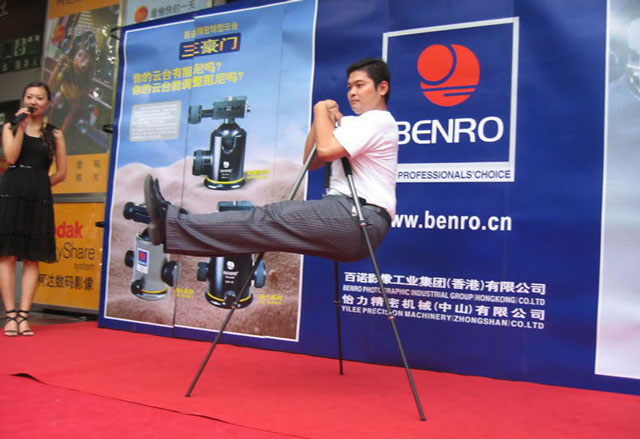
Benro used to advertise the weight their tripods could handle by showing a person hanging from one
Generally the more weight a tripod can handle, the larger and heavier it will be. (Though weight for weight a carbon fiber tripod will be able to take a heavier load than an aluminum one). So you need to strike a balance between the amount of weight you need the tripod to handle and the portability of the tripod.
Vibration reduction
Vibration reduction ensures that vibrations from the surrounding area are not carried up the legs to the camera. It also ensures that if the tripod is knocked, the vibration dissipates quickly. Even the handling of the camera / tripod head will cause vibrations, so you want the vibrations gone as quickly as possible so you can get on with taking the shot.
For example, if you're taking a long exposure photo by the side of a road and a heavy truck comes past. You don't want the vibration caused by the truck traveling through the ground and then up the tripod to your camera.
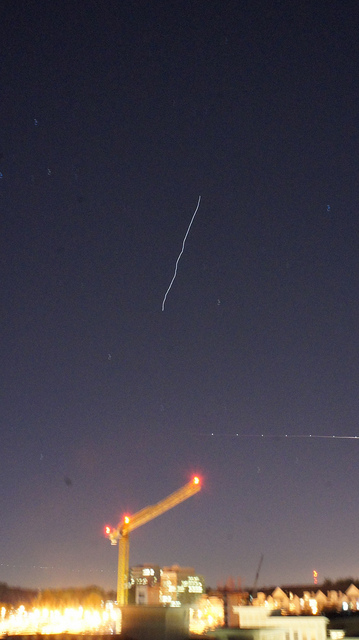
ISS Flyover 2012 Oct 11 by brownpau on Flickr (licensed CC-BY) - although this was taken on a tripod, vibrations from passing cars have affected the image
Unfortunately you are unlikely to find details about how well the tripod deals with vibration in its specifications. But some tripod reviews do include information about this.
Most tripods do a good enough job of dampening vibrations for the vast majority of uses. But if this is something that is important to you, then you might want to check reviews of any tripods you are considering to see how they compare in this aspect.
Height
Along with weight and the weight bearing capacity of the tripod, the height of a tripod is one of the main points to consider. The height that a tripod will extend to is a trade off with the height of the tripod when collapsed, and the weight of the tripod.
Travel tripods can be collapsed quite small and weigh quite a bit less than standard tripods. But as a consequence they don't extend as high. The majority do not extend to eye level height, meaning you'll have to bend down to look through the camera's viewfinder when mounted on the tripod. (As a side-note, eye level is not always the best height to take a photo from anyway).
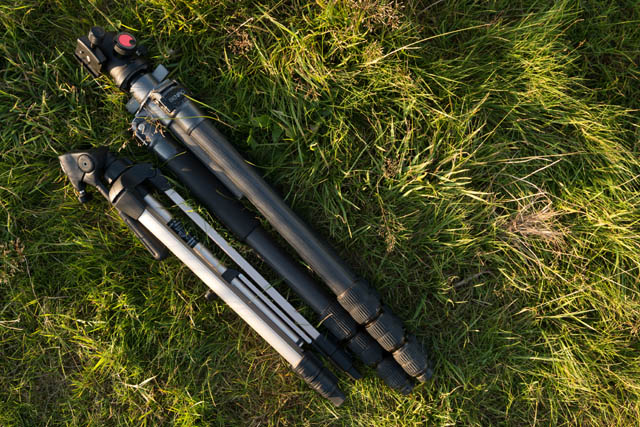
Cheap smaller tripod compared to larger standard tripod when collapsed
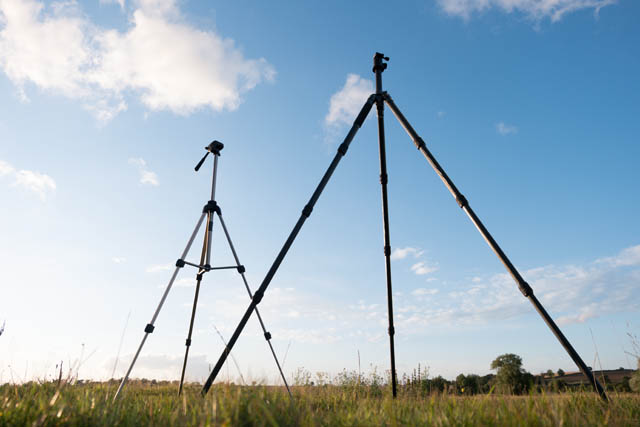
Cheap smaller tripod compared to standard tripod when fully extended
You'll find that two maximum heights are typically given for a tripod - one with the center column extended, and one with it collapsed. While extending the center column does let you get the camera up higher, it is generally not a good idea. It makes the camera much more susceptible to shake.
I would suggest to look at the height with the center column down as the true maximum height of the tripod. The fact the center column can be extended should be looked on as a bonus.
The other aspect of height is how low the tripod will go. This is a combination of the minimum length of the center column and the maximum angle of the legs. Most tripods will have the minimum height listed in their specifications.
Some tripods have a special short center column that allows you to get lower than you can with the standard size center column. Some tripods come with both a short and standard size center column, while others don't have a short center column available even as an extra. So this is a point worth checking.
Most tripods use a center column that can be reversed. This means that you can mount the camera upside down under the under tripod for low-angle shots. While this is usable, it is certainly not as convenient as having a tripod that will let you get low angle shots with the camera the right way up.
Rotating center column
Related to the previous point of the tripod's minimum height, some tripods come with a rotating center column. This allows you to extend the camera away (and down) from the center of the tripod - very useful for low angle shots.
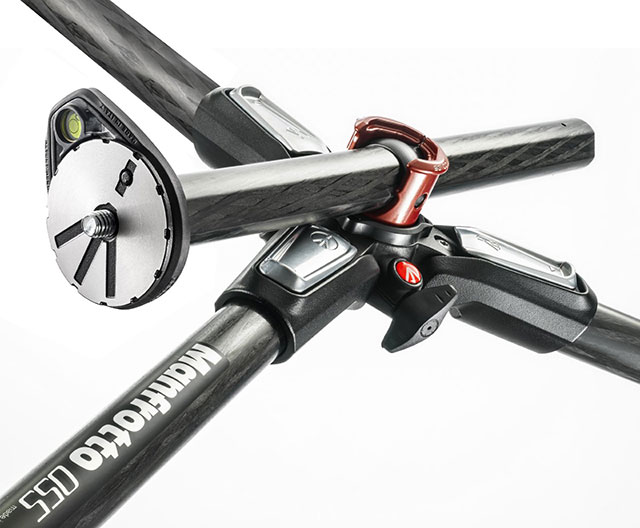
However, since it moves the weight of the camera away from the tripod's center of gravity, it does affect the stability somewhat.
Size when collapsed
The size of the tripod when collapsed can be important when traveling Most travel tripods use a clever design where the legs fold back up against the center column and head. This, combined with using shorter leg sections, allows the tripod to fold up smaller than a standard tripod.
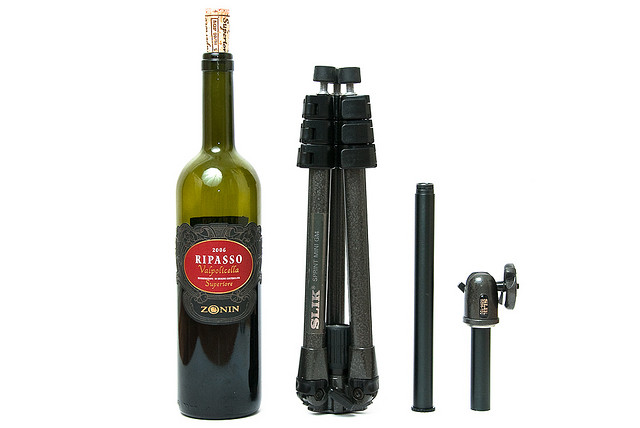
SLIK Sprint Mini GM by Eric Wüstenhagen on Flickr (licensed CC-BY-SA)
The benefit of this is that it can easily fit in a bag or suitcase. Larger tripods may not fit at all, or be quite a squash to fit in, depending on the size of the tripod and your bag / suitcase, of course.
The small size also makes them easier to carry around with you, making them more suited to attaching to the outside of a camera bag. Or even carrying around inside your bag.
Weight
There's not a lot to say about weight, other than the heavier a tripod, the more stable it is likely to be. If you're going to be carrying your tripod around with you a lot, then weight is probably a primary consideration. There's little point in having a tripod if it's too heavy to take with you.
Leg lock type
There are two main types of leg lock - twist and lever. With twist leg locks, you untwist the lock to unlock the leg section. Then after extending the leg section you twist the lock back again to tighten the leg section in place.
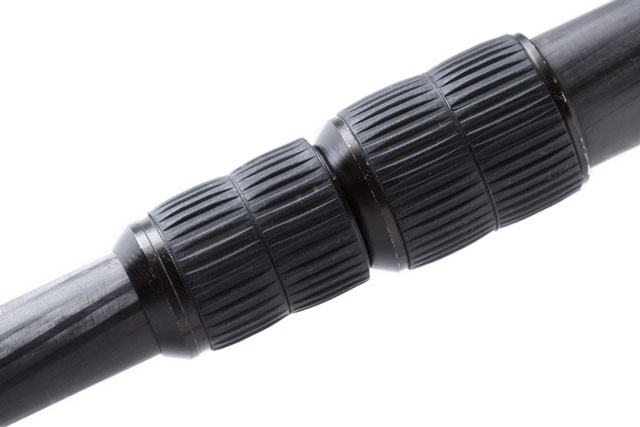
Tripod leg sections with twist locks
With a lever lock, you flip the lever up to open the leg section. Then close it back down to lock the leg in place.
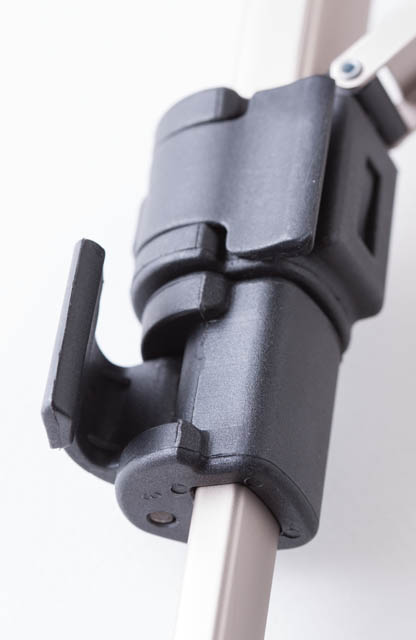
Tripod leg sections with lever locks
Both twist locks and lever locks are popular. If possible, it would be a good idea to try out both at a local camera store or photographers' meet-up before you buy.
With twist locks, there is no definite 'locked' position. So you can sometimes tighten a leg only to find it slipping, and that the lock needs tightening more. You don't want to tighten the locks as much as you physically can either, as then undoing the locks will be pretty difficult.
With lever locks this is less of an issue, though it is possible to think that you've fully closed a lever when actually it's just partly closed, which could then result in slippage of the leg section.
In theory, lever locks will wear out / become less effective more quickly than twist locks, which you can just tighten as much as is needed. However, lever locks wearing out is hardly a common problem in practice.
One disadvantage of twist locks is when you are working in varying temperatures. If you move from a cooler to a warmer environment, the legs will expand slightly. This can make getting the locks undone a lot harder if they were already locked tightly in the cool environment.
Number of leg sections
The number of leg sections in a tripod affects not only how small the tripod will fold up, but also how quickly you can set it up. Travel tripods typically have 5 sections meaning they fold up very small. But then you have to extend all 5 of these sections to get the tripod up to its full height.
Most standard tripods, on the other hand, only have four leg sections, and would be the same height as a travel tripod with only three sections extended. So setting up a standard tripod will be much quicker than a travel tripod.
The number of sections also affects the stability of a tripod. With 5 leg sections, it gives 5 joints where possible wobbliness can occur. It also means that the bottom most section is likely to be quite thin. But with fewer sections, the wider the bottom section will be, and thus the better stability you'll get.
Leg positioning
Tripod models vary in the angles the legs can be set at, the number of different angles they support, and also how the angles of the legs are set. The wider the maximum angle and the larger the number of angles the legs can be positioned at, the more flexible the tripod will be.
The ease of setting the legs into position should also be considered. Some tripods feature an angle lock you must pull out to unlock the leg, and notches on the plate above the leg that the lock can rest against to set the angle of the leg.
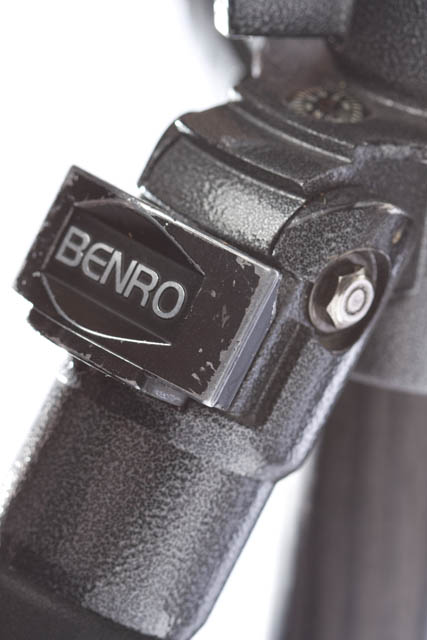
Example of a pull-out leg angle lock
Other designs have legs that will automatically lock into place as they pulled in one direction, while pressing an unlock button down is required to unlock the legs when moving them back in the opposite direction.
Monopod option
A feature often seen with travel tripods is that one leg can be unscrewed, and used as a monopod. This means that rather than buying both a tripod and monopod, you can just buy a tripod and use the monopod leg whenever that's more convenient.

It could be particularly useful when traveling as it gives you both tripod and monopod without taking up the extra room and weight of a dedicated monopod.
Weight hook
A feature of most tripods is a (usually detachable) weight hook at the bottom of the tripod's center column. This can be used to add some extra weight to the center of the tripod, which helps in steadying it.
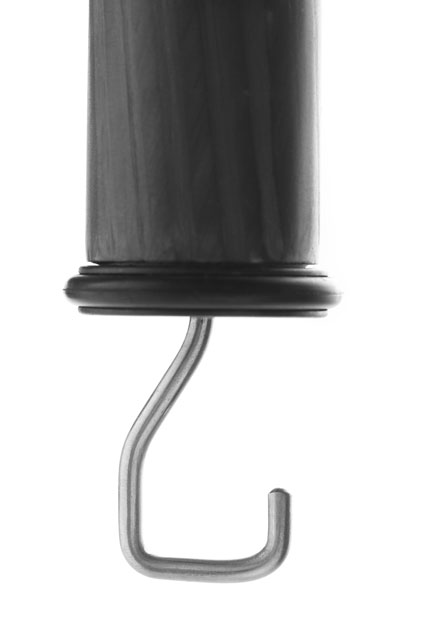
Weight hook at the bottom of a tripod's center column
While you probably don't carry around a bag of weights with you, hanging your camera bag from the weight hook can work well. This is particularly useful with travel tripods, which tend not to be as sturdy as a full size tripod.
Feet
Most tripods come with rounded rubber feet on the ends of the legs that work well in most conditions. However, being able to use different feet on the tripod can be quite useful.
Tripods that feature interchangeable feet often have an option for using spiked feet. These are useful when working outside, as the feet can be pushed into the ground, further securing and stabilizing the tripod.

Some tripods come with feet that feature retractable spikes (or have them available as an optional extra). This means that you don't need to bother changing the feet when you want to use the spikes - just extend the spikes from the feet instead. This does typically require a tool (screwdriver) though.
Snow shoes are also available for some tripods. These are usually in the form of feet that slip over the rubber feet. These give the tripod feet a larger footprint and help stabilize it on surfaces such as snow, sand, and gravel.
Mounting screw
There are two main screw / thread sizes used in photography equipment - 1/4″ and 3/8″. The vast majority of tripod heads use a 3/8″ thread, and most tripods come with a 3/8″ screw on top for mounting these heads on.
There are some tripod heads though that use a 1/4″ thread, and some tripods that have a 1/4″ screw. You can purchase adapters to go from 1/4″ to 3/8″, or even from 3/8″ down to 1/4″. But these are not ideal (particularly the 3/8″ to 1/4″ adapters).
So it is best to look for a tripod that features a reversible screw, with a 1/4″ screw on one side and 3/8″ on the other. This gives you more flexibility, so you can use heads with either thread size on your tripod, with no need for adapters.
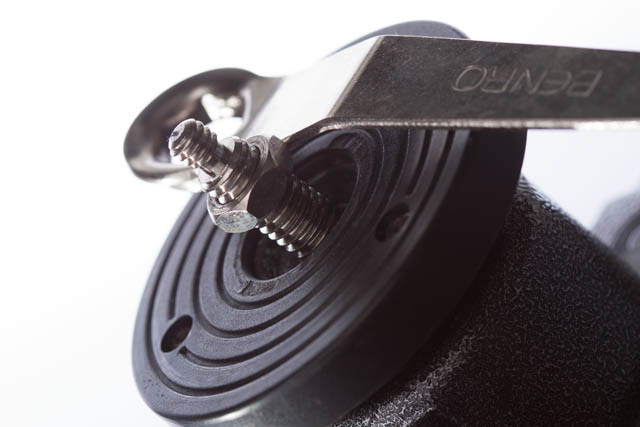
Changing the screw thread size on a tripod with a reversible screw
Head included?
Some tripods come with a head included. In terms of very cheap tripods, this may be a fixed head that cannot be removed - I would avoid this type of tripod.
If the tripod does come with a head included you need to think about how useful the head will be to you. For example, if you're going to be mainly using the tripod for macro photography, and it comes with a ball head, this probably won't be much use to you. A geared head would be much better.

Also consider how much you save by getting the head included with the tripod. And look for reviews of the head to see how good it is. If one tripod comes with a head included and costs $40 more than one with no head, this might seem like a good deal. But if the head isn't very good, then it's not such a bargain.
There's certainly lots to think about when looking at buying a new tripod. There are big trade-offs between the sturdiness of a tripod and the weight / size. The important thing is to look for the features that suit you and type of photography that you like to do.
