How to create a Droste Effect recursive photo
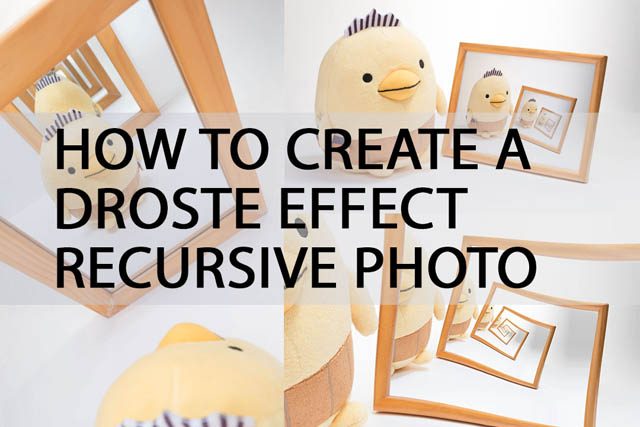
The Droste effect is the name given to the effect when a picture appears within a picture of itself.
It is named after a brand of Dutch Cocoa powder, whose box featured an image of a woman holding a tray with a cup of cocoa and the same box with the same image on it.
The infinite recursion of the Droste effect is an unusual technique, but can produce some great images. In this article I'll look at how to create two different versions of the effect - the frame within a frame technique, and the spiral technique.
Frame within a Frame Droste Effect
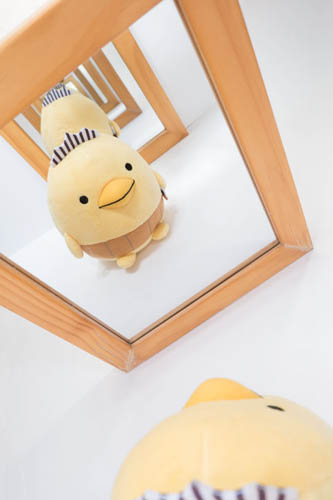
Using mirrors
The simplest version of this technique is simply to photograph yourself holding a mirror while standing opposite a mirror. The mirror you hold will then reflect the image in the other mirror of you holding the mirror.
This is slightly different from the true Droste effect, though it can be used for a Droste style effect where you capture alternating images between the front and back of a subject.
The issue with this technique is that getting the angles between the mirrors and the camera to create the effect can be quite tricky. And achieving the effect without capturing your camera in the image is even more difficult.
Using image editing software
The alternate (and easier) method for creating the picture within a picture Droste effect is to use image editing software. You will need a program that supports layers, such as the GIMP, Paintshop Pro, or Photoshop. For this example I'll use Photoshop Elements.
Firstly you simply need to photograph your scene with an empty frame in it. The orientation of the photo needs to be the same as the orientation of the frame within the image. So if the frame in the image is landscape oriented, then you should take the photo in landscape orientation too.
Open your image in your photo editing software.
If your frame has an unusual aspect ratio, then crop your photo down so that it meets the same ratio as the frame. For example, if the frame in the image is a panoramic format, then your photo needs to be in the same panoramic format, otherwise it won't nest inside the frame correctly.
For my example photo the ratio of the photo and the frame are similar enough that I don't need to bother doing any cropping.
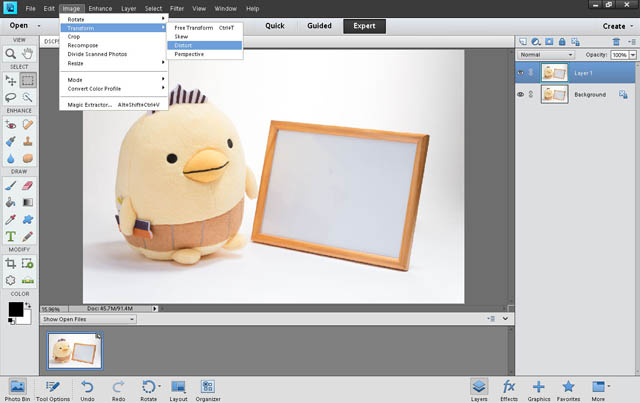
Select the background layer in the layers palette and duplicate it. (Ctrl / Cmd + J or Layer > Duplicate Layer...)
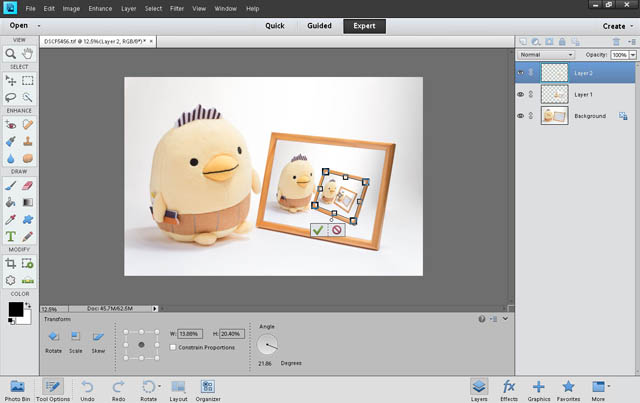
Using Photoshop's transform tools, transform the new layer so that it fits in the empty frame of your image. The transform tool to use will depend on how your frame is angled, for my image the distort tool works best. In Photoshop Elements this can be found by selecting the layer to transform, then going to Image > Transform > Distort.
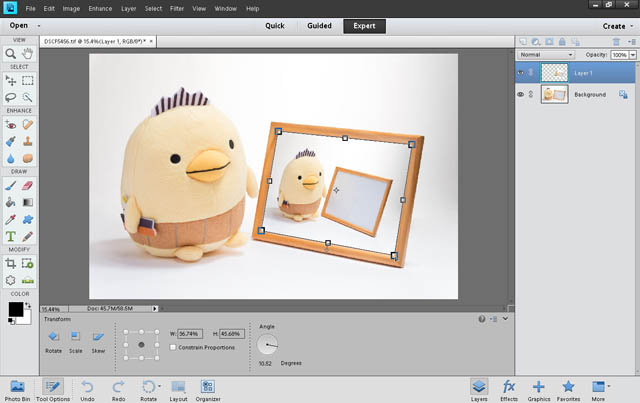
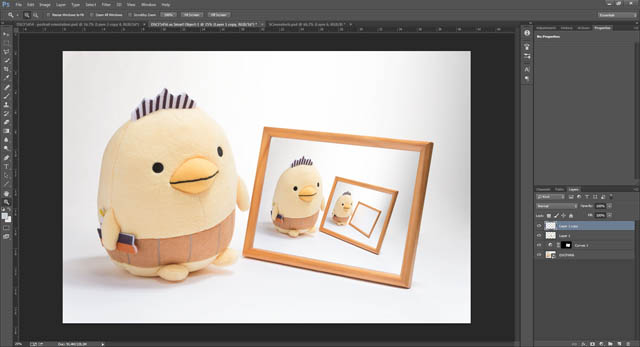
Dragging on the corners of the selection box allows you to distort the image so that it fits in the frame. You can zoom in / out using Ctrl / Cmd and the plus and minus keys on the keyboard to help position the image accurately. When you have the image sized correctly to fit in the empty frame, apply the transformation by pressing Enter.
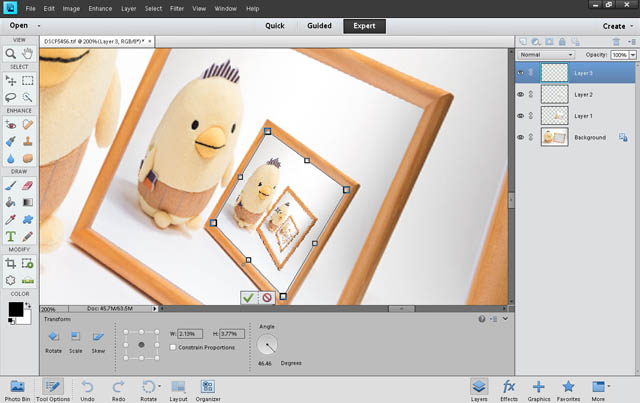
Now create a selection of the entire image (Ctrl / Cmd + A). Copy merged (Ctrl / Cmd + Shift + C). Then paste (Ctrl / Cmd + V). Now repeat the same step as before, transforming this new layer so that it fits in the empty frame of the inner image.
Repeat this process of copying the merged image, pasting, and then transforming it into the innermost frame one more time.
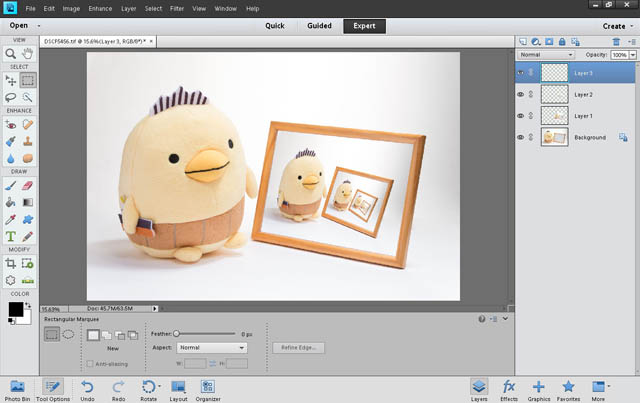
This gives us our final image with the Droste effect applied so that the recursion of the image within the image seems to go on forever.
Using Transform Again in Photoshop
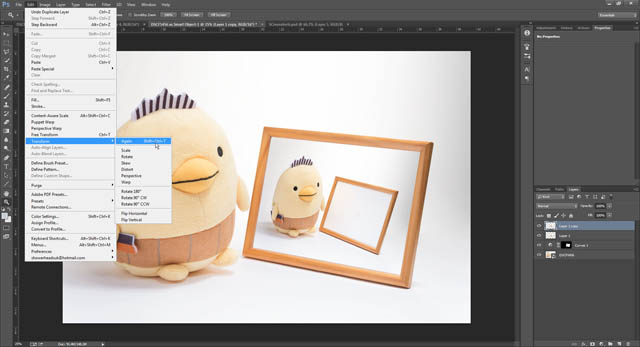
If you have the full version of Photoshop, this process can be simplified quite a bit. After transforming the image to fit into the frame for the first time, don't select and copy the merged image. Instead, duplicate the layer you've just transformed (with the layer selected in the layer palette press Ctrl / Cmd + J).
Now go to Edit > Transform > Again (or press Ctrl / Cmd + Shift + T). This will perform the same transformation you just did to your new layer, putting it inside the frame of the inner image.
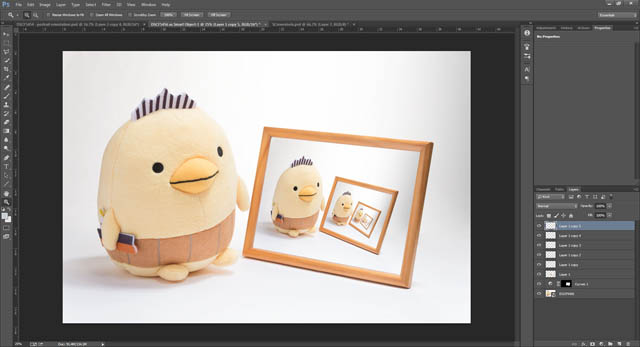
Duplicate this layer, then use Transform again on the duplicate. Repeat this duplicating and transform again process until you have enough layers that you can't see an empty frame in the innermost image.
This method results in more layers than the copying merged and transforming manually method, but it is a lot faster. Sadly the transform again command is not available in Photoshop Elements.
Making the effect more realistic with blend modes
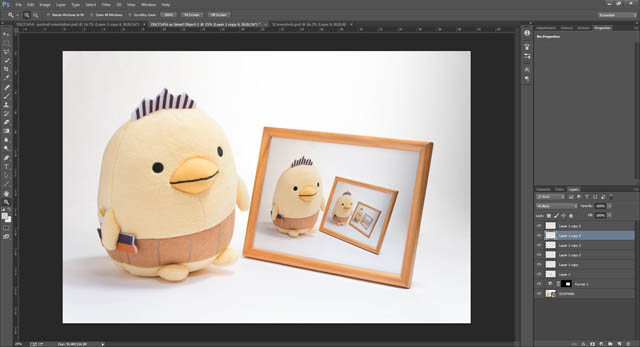
To make the effect more realistic, you may want to consider playing with the blend modes of the layers. If you are using the transform again method, then you can adjust the blend modes of the layers after creating the Droste effect. Otherwise, if you're copying the merged images and then manually transforming the image again, you must set the blend mode for the layer at each stage before copying the merged image.
By using a blend mode such as multiply, the image appears more to be inside the frame rather than pasted on top.
Note that for this image I first created a curves adjustment to brighten and remove a blue hue from the inside of the frame. This is because multiply blend mode means the layer will just darken the layer below it. So the inside of the frame needs to be quite bright to avoid the inside image appearing too dark. After adding the curves adjustment I then copied the merged image and then followed the transform again process.
Making the effect more realistic with an inner shadow
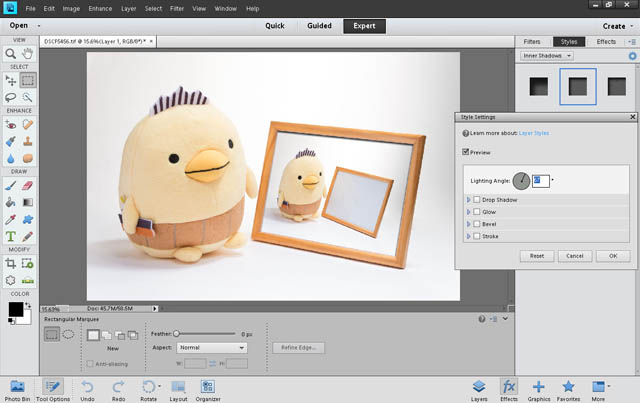
Alternatively (or additionally), you can try adding a inner shadow to the inner image. I'll go through this process using Photoshop Elements.
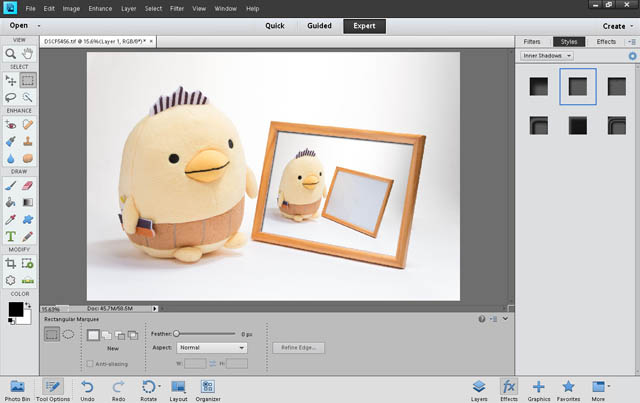
After duplicating and transforming the first image, go to the Effects panel, choose the Styles section, and then select Inner Shadows. Double click on one the inner shadow styles to apply it.
Use the options (cog above the style examples) to modify the angle of the shadow to match the lighting of your image.
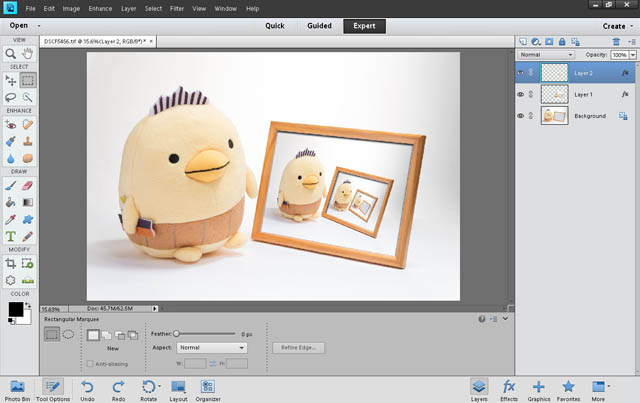
When you have the shadow as you like, go back to the layers palette and then copy, paste, and transform the merged image as before. Add the inner shadow again to this new image. You'll find the shadow is much too large.
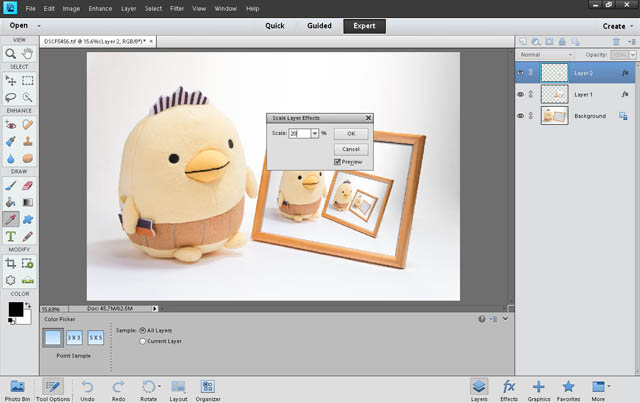
To adjust the size of the inner shadow, on the menu go to Layer > Layer Style > Scale Effects. Here you can reduce the size, for this image I find a setting for around 20% works well.
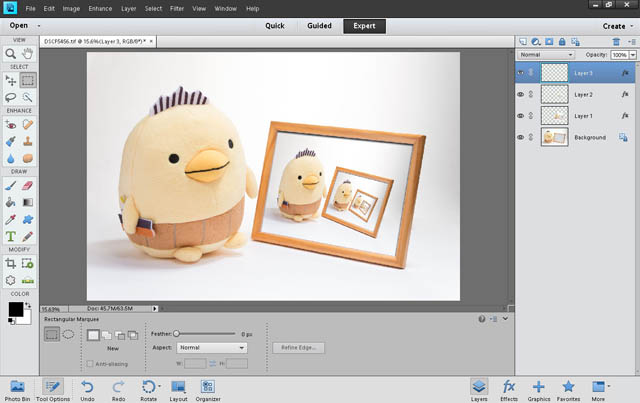
Then repeat again a final time for the finished image. (You'll need to set the scale of the inner shadow even smaller for the final layer - around 5% worked well for this image).
Spiral Droste Effect
To create a spiral Droste Effect you will need some special software / plugin that handles the complex mathematical calculations required. For the full version of Photoshop you can use the Pixel Bender Filter:
However, it should be noted that PixelBender is not natively compatible with Photoshop CS6 and later. For CS6 / CC you will need the Pixel Bender Accelerator for Photoshop, which currently sells for $30.
For GIMP you can use the Mathmap filter. A good tutorial on this can be found here: New Droste Effect Tutorial.
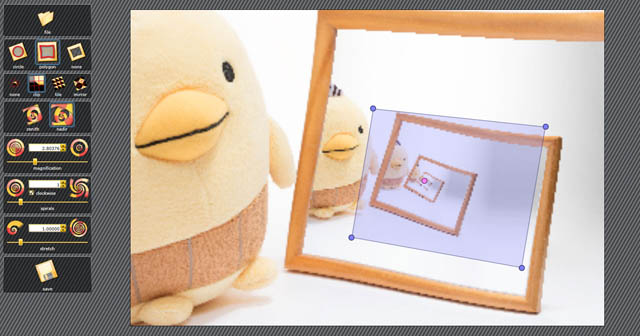
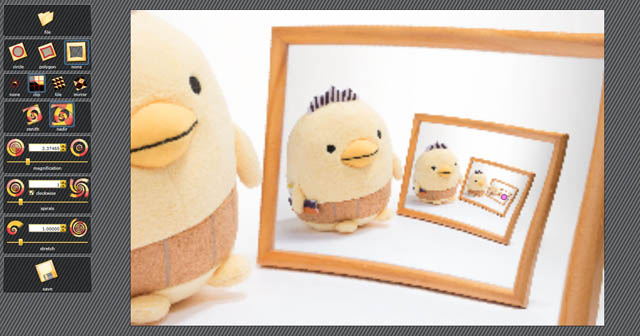
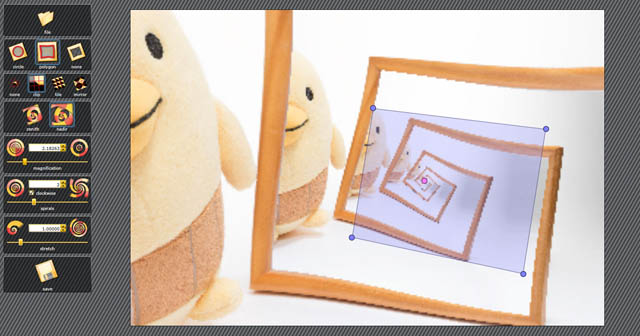
Finally, there is also a piece of software that works from your web browser to allow you to create spiral Droste effect images - PhotoSpiralysis.
One thing to note that doesn't seem to be mentioned in the PhotoSpiralysis manual, is that you can click and move the center point of the effect by clicking and dragging on the small pink dot.
Whichever piece of software you decide to use, you'll probably want to play around with the different settings before you get something you're happy with. Note that applying the effect to the image can take some time (depending on your computer and the image size) due to the complex calculations needed.
The Droste effect is hardly something you'll want to regularly apply to your photos. But it is a fun, creative, and unusual effect that can be used to create great images. Why not give it a try?
