Autofocus modes and AF area selections explained
Modern cameras offer a plethora of autofocus options to help you get the best focus performance possible, whether you're photographing a fast moving sports car or a static still life subject. In this article we'll look at the various different modes and options, what they mean, and when you might want to use them.
How does autofocus work?
To start off with, I'll go over a very simplified explanation of how autofocus works. Light enters the camera through the lens and hits an autofocus sensor. This could be a dedicated AF sensor (like in a DSLR) or the image sensor (like in a CSC or compact camera). The sensor looks for a strong contrast to tell if the light hitting it is in focus or not.
If the lens is not focused, then the area will be blurry and so low contrast. If the lens is focused, the area will be sharp and so high contrast. The camera tells the lens to focus until the light it receives is high contrast (and so focused), when it tells the lens to stop focusing.
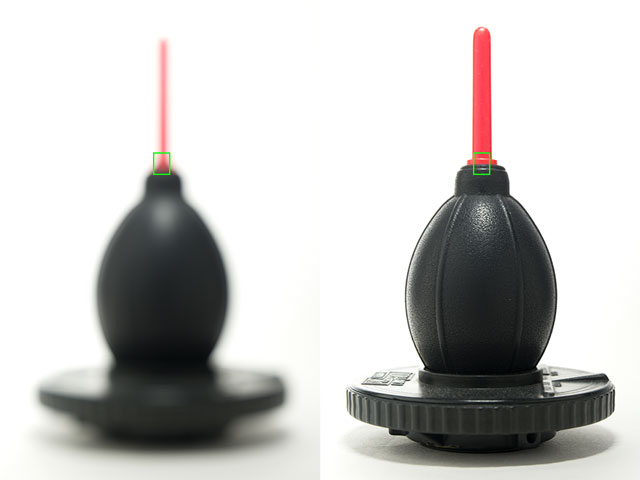
The camera uses contrast to detect focus. When out of focus the colors and tones are blurred together (left). When in focus the contrast between different tones and colors is much stronger (right). When maximum contrast is achieved, the area being focused on should be in sharpest focus.
This is why if you try and focus on something with little contrast (like a plain white wall), the camera will have trouble autofocusing. Whereas if you focus on something high contrast (like a black mark on a plain white wall) the camera will be able to autofocus quickly and accurately.
So when focusing, try to always use an area of high contrast to focus on if possible. For example, focus on a person's face, not the plain sweater they're wearing.
The other factor that affects autofocus is the amount of light that the autofocus sensor receives. The more light it receives, the faster and more accurately the camera can focus. Cameras today are very good at focusing in low light, but you will probably notice they don't focus as fast as they do in bright light.
Autofocus speed and accuracy can also be affected by the type of autofocus system used by the camera and the lens, but going into that isn't really needed for this article. For a more in-depth explanation of exactly how autofocus works in different cameras, have a look at this video:
AF, MF, and AF/MF
All interchangeable lens cameras, and many high-end all-in-one cameras allow you to choose between autofocus (AF) and manual focus (MF). With autofocus the camera automatically focuses when you half-press the shutter button (typically - autofocus can also be re-assigned to a different button).
Whereas with manual focus, you are left to focus the lens yourself, using a focusing ring on the lens. Most (not all) cameras and lenses have a switch on them that allows you to choose between autofocus and manual focus mode. Bear in mind that with most combinations having the camera body set to manual focus but the lens set to autofocus (or vice versa) will result in the focusing mode being set to manual. It is only with both the camera body and lens both set to AF that autofocus will be used.
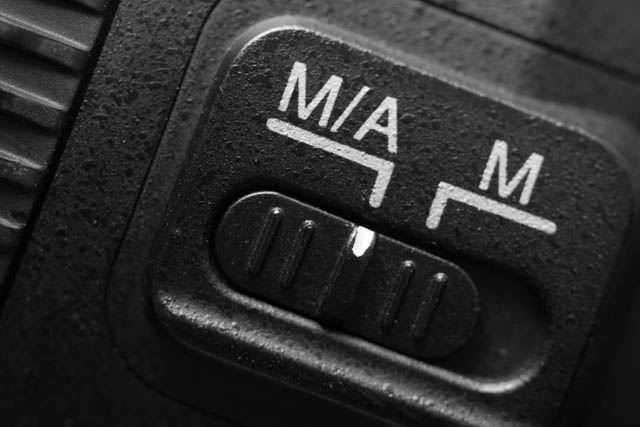
Autofocus mode switch on lens allowing to switch between AF/MF and MF only modes
Some lenses allow you to choose between AF, AF/MF, and MF focusing modes. The AF/MF mode means that the camera / lens will use autofocus. However, you can also use the focusing ring to manually focus the lens whenever you want. It's basically autofocus with manual focus override.
Single shot autofocus
Single shot, also known as One shot and AF-S is the most commonly used autofocusing mode. When you half-press the shutter button, the camera autofocuses. When it thinks the subject is in focus, it stops focusing. Then it will give a beep or show the focusing area highlighted in green in the viewfinder or on the rear screen to show that it has successfully focused on the subject.
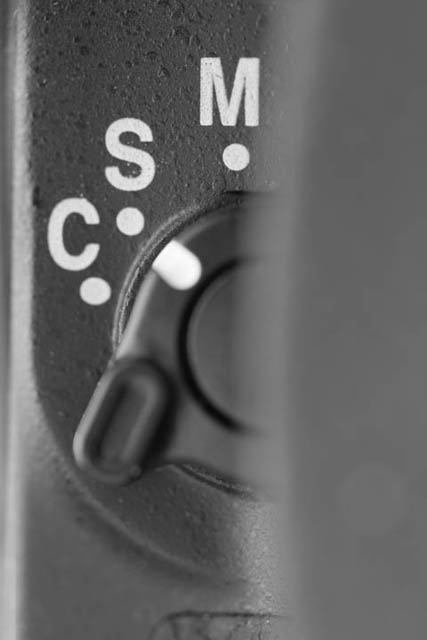
Some cameras feature a lever allowing you to select the AF mode, while with others you press an AF mode button then scroll through the different modes available to select one
This focusing mode is good for photographing static subjects, which is why it is the default focusing mode, and the one most people prefer to use.
It's not so useful where you or the subject are moving, as the distance between you and the subject could change between the time the camera locks focus and the time you fully depress the shutter to take the photo.
Continuous autofocus
Continuous autofocus may also be known as AI Servo or AF-C. In this mode the camera continues to focus for as long as you have the shutter button half-pressed. This mode is very useful for photographing moving subjects.
For example, if you have a person running towards you, and you half press the shutter button to start autofocus. The camera locks focus on the subject, but it then continues to adjust the focus to keep the subject in focus as they move towards you. When you press the shutter button fully it will take a photo where the subject is still in focus even though their position has changed since when the camera first locked focus on them.
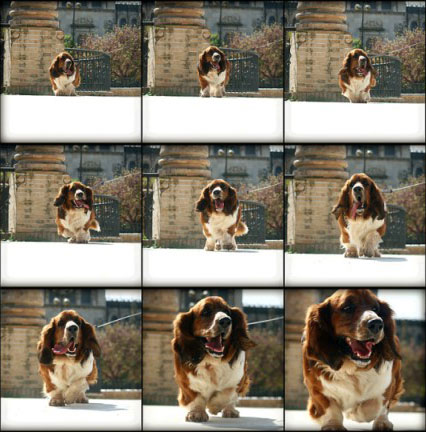
Sequence of a dog walking towards the camera, shot with continuous autofocus, slightly modified version of La saga del trote cochinero by Carlos Alejo on Flickr (licensed CC-BY-SA)
Continuous autofocus is very useful for photographing subjects such as Sports, Motor racing, Birds and other Wildlife, your kids running about, etc. Anything where the subject is moving really.
The only potential problem with continuous AF is that if the subject moves out of the area of the frame where the camera is focusing, then the camera may switch the focus to the background (or whatever is now in the area where it is focusing). For example, if you're focusing on a Sports player. If another player then walks between the camera and the subject, the focus may switch to the other player.
Auto
Some cameras feature a mode that automatically switches between either single shot or continuous autofocus as the camera sees fit. This has the possibility of giving you the best autofocus mode for whatever you're shooting without you having to change any settings. On the other hand, there's no guarantee that the camera will judge what the best mode is correctly.
Manual
Manual focus mode could be described as the 'No' autofocus mode. For most photographers manual focus is a mode they will seldom use.
It can be useful if you are photographing a subject where you want to take multiple photos, but neither the camera or subject will move. In this case there is no use for the camera to autofocus for every photo, and manual focus can be used to set the focus where it is wanted, then left locked in place for subsequent shots.
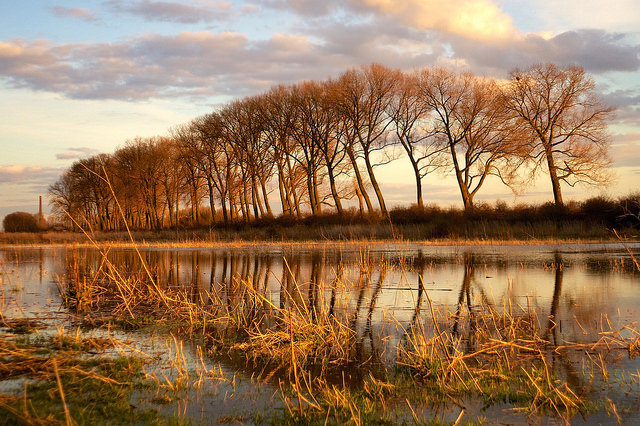
Easter Evening by Machiel van Zanten on Flickr (licensed CC-BY)
Manual focus can be useful for still life and product photography, landscape photography, and architectural photography. These styles of photography typically involve setting the camera up on a tripod, and you can afford to take your time and focus manually. It is also useful for macro photography - most lenses don't autofocus quite as well near their minimum focus distance.
With practice it is possible to manual focus very quickly - some photographers claim they can manual focus faster than a lens can be autofocused. But it would take a lot of practice to be able to manually focus that quickly while still keeping the focus accurate.
AF Areas
Most cameras also allow you to choose the area of the frame that the camera should focus on. Some cameras have the AF areas as separate options to the autofocus modes, others have them bundled together. If you want to be sure of the autofocus modes your camera supports, and the way they work, then it is best to read the relevant section in your camera's manual.
DSLRs typically only have a certain area of the frame where autofocus can be used to focus on a subject. This is usually a diamond shaped area, meaning that if you want to focus on a subject in the corner of the frame you will have to use the focus-recompose technique.
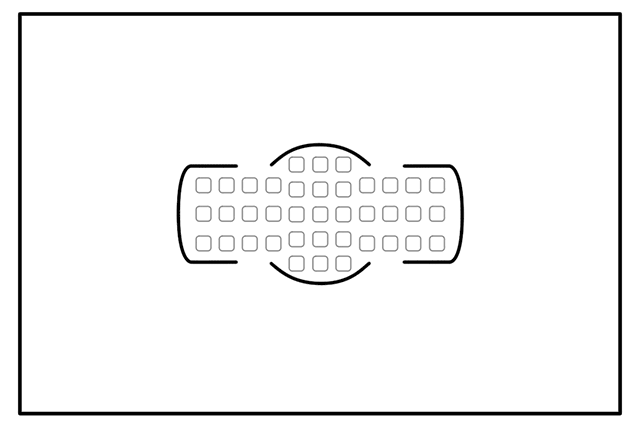
Example of the AF point coverage on the Nikon D600 DSLR - the AF points only cover the central area of the frame
The focus-recompose technique is where you place the subject near the center of frame, and lock focus on them. Then you reframe the image as desired, then fully depress the shutter button to take the photo.
Most non-DSLR cameras and DSLR cameras when used in liveview mode will allow you to focus anywhere in the frame, and are not restricted to a central portion of the frame.
With DSLR cameras, the focus points near the very center of the frame are typically more sensitive than the focus points further from the center. To take full advantage of the extra sensitivity of these focus points usually requires a fast lens (f/2.8 or faster). With a fast lens the extra sensitivity can be useful as a shallow depth of field from a large aperture will make any misfocus more apparent.
Single Point AF Area
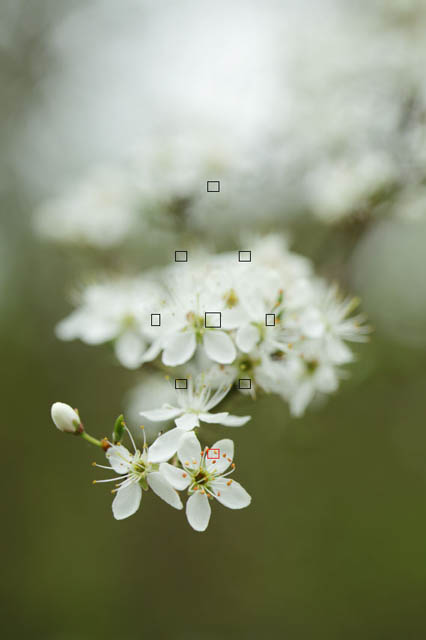
The single point autofocus area is probably the one preferred by most (but certainly not all) photographers. In this mode a number of autofocus points are made available across the frame, and you select which point you want to use. The camera will then try and focus on whatever is under that point whenever you tell it to autofocus.
The AF point can be changed usually by pressing an AF point selection button, then using a direction pad or wheel to select / scroll through the different points available. The exact method of AF point selection will vary from camera to camera though, so it is worth checking your camera's manual if you're not sure.
The benefit of single point AF is that it allows you to very carefully select exactly where in the frame you want the camera to focus. You can easily choose off-center focus points for when your subject is not at the center of the frame.
Dynamic Area AF
Dynamic Area AF mode, also known as AF Point Expansion mode, is suitable for using with continuous AF for tracking moving subjects. You select a focus point, and focus on your subject. If the subject (or the camera) moves so that the chosen AF point is no longer over the subject, but one of the surrounding AF points still covers the subject, then that AF point will be used instead, keeping the subject in focus.
![]()
Practicing with AI Servo AF mode Canon 5D Mark III by Dave Dugdale on Flickr (licensed CC-BY-SA)
This can be very useful when you are moving the camera to track a moving subject, as it can be quite difficult to keep the subject in exactly the same place in the frame at all times. Dynamic area AF gives you a bit of leeway so if the subject is near but not directly under the selected AF point, they can still be kept in focus.
Most cameras that feature Dynamic area AF will let you choose how large the dynamic area around your selected focus point should be. Some cameras even allow you to use all focus points as the expansion area, meaning you can (in theory at least) focus on a subject on the right-hand side of the frame, then the camera can track it as them as they move across to the left hand side of the frame.
Group Area AF
With this type of focus point selection, rather than selecting a single point, you select a group of autofocus points. The camera will try and keep the subject in focus, so long as it falls under at least one of the focus points in the group selected.
If it sounds quite similar to the dynamic mode, it is. Deciding whether a subject works best with Group area AF or Dynamic area AF is usually a case of trying with both and seeing which gives you best results. Note that the effectiveness will differ between camera models as newer models bring in more intelligent autofocus algorithms.
Auto Area AF
And of course, we have the Auto mode as well. In Auto the camera tries to work out what the subject is and focus on it all by itself. Most modern cameras feature face detection, and will try and focus on a face if they detect one in the scene.
While auto area selection makes life easy, it means you're handing over part of your creative control to the camera. And the camera won't always choose the correct thing that you wanted it to focus on. It can be useful if you're handing the camera to someone else to take a quick photo though.
Hopefully this article has given you a good overview of the different focusing modes, AF area selection options, and when you'd want to use which setting. Now, find some still subjects and some moving subjects, and put this knowledge into practice!
