What to look for when buying a Speedlight Flash: Head, sockets, and lights
Continuing on from the previous two articles about what to look for when buying a Speedlight Flash, in this article we'll be looking at some more speedlight features. Some speedlights may include all the features discussed in this article, others may not include any of them. Hopefully by the end of this article you'll know whether these features will be important for your photography, and so be able to make an informed decision when deciding which model of speedlight to buy.
Head movement
The majority of speedlight flashes feature flash heads that can be tilted up, and rotated 180° in one direction and 90° in the other direction. However, some flashes feature tilt only, and others (typically smaller speedlights) may have a fixed position head.
A flash head that can be tilted up is very useful when you want to use bounce flash off a ceiling. Simply tilt the flash head up so that it aims towards the ceiling. Bounce flash like this gives much softer, more natural looking lighting than direct flash aimed straight at your subject.
Rotation of the flash head is useful in the same way, but for bouncing the flash off a wall rather than the ceiling. Or for bounce flash off the ceiling when holding the camera in portrait orientation (and vice versa).

Comparison using a speedlight flash mounted in the camera's hotshoe. Direct flash produces harsh light while bouncing the flash creates more pleasing softer light. In these examples a piece of polystyrene was used to bounce the flash - a larger surface such as a wall or ceiling would produce even softer light with less directionality.
Tilt is useful for both on-camera and off-camera flash, whereas rotation is more useful for on-camera flash. You can rotate the whole flash manually to aim it at a wall when used off camera, but you can't do that when using it on-camera. For a flash that has a fixed head, you can aim the head upwards by mounting the flash on a mini ball head when using it off camera (it could also be done on-camera though would be pretty kludgy), but a flash with a tilting head is much easier to use.
If you're looking for a flash to use on-camera I would definitely recommend going for one that allows both tilting and rotating the flash head. This makes bounce flash so much easier. For off-camera use, it doesn't matter so much, but a tilting head is still preferable to a fixed head flash.

Example of speedlight with head tilted and rotated
A head that also rotates is very useful if you plan on bungee cording your flash around supports, rather than mounting it on a light stand or clamp. You can rotate the head 180° and then bungee the flash so that the flash controls are facing outwards, instead of being pressed against the support.
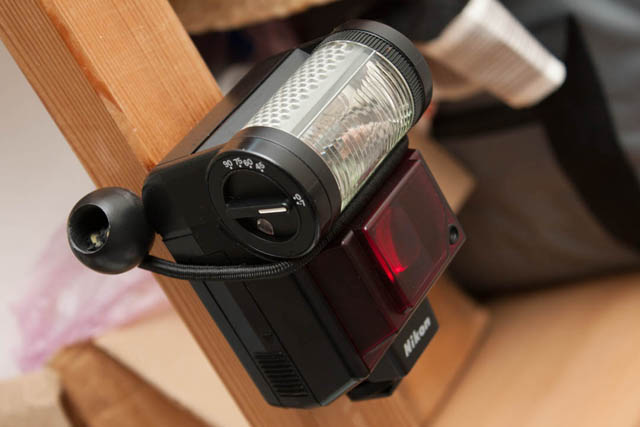
Speedlight with non-rotating head bungeed to support - flash controls are inaccessible.
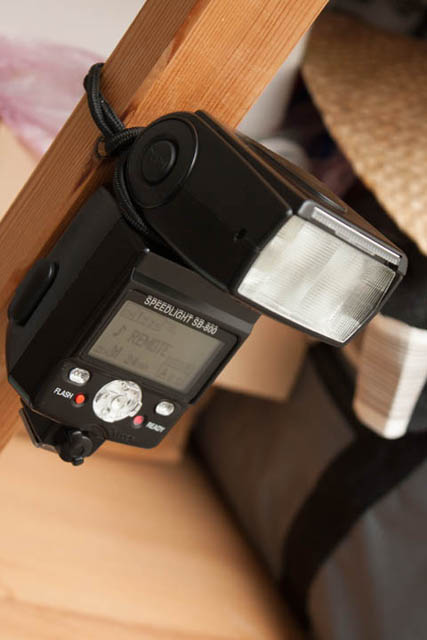
Speedlight bungeed to support with head rotated 180° so that flash controls are still accessible.
Most flashes only have a very minor tilt down - often around -10°. If you want your flash tilted down, then you'll need to mount the flash on something else that can be tilted, such as an umbrella holder or mini ball head.

Using an umbrella holder to tilt an off-camera flash downwards

Using a mini-ballhead to tilt down a flash on-camera. (Note I don't recommend this setup and can't think of any instance where it would actually be useful - it's just an example to show it could be done).
Zoom head
As I mentioned in the first article in this series, some flashes have a zoom head that allows you to go from a wide spread of light to a more narrowly focused beam. Being able to adjust the zoom of the flash allows you to optimize the light output of the flash.

Zoom settings on LCD screen of speedlight
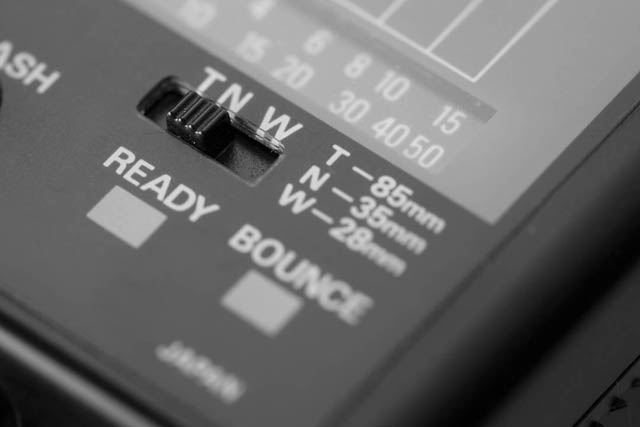
Older speedlight with a zoom switch
If you are shooting at a focal length of 50mm, but your flash outputs light to cover the field of view of a 35mm lens, then much of the flash's output is being wasted. By zooming the flash head to 50mm, the output of the flash will match the field of view of your lens, minimizing the wastage of light off to the sides. As discussed in the first article, this lets you get more power at longer focal lengths than a flash with no zoom function.
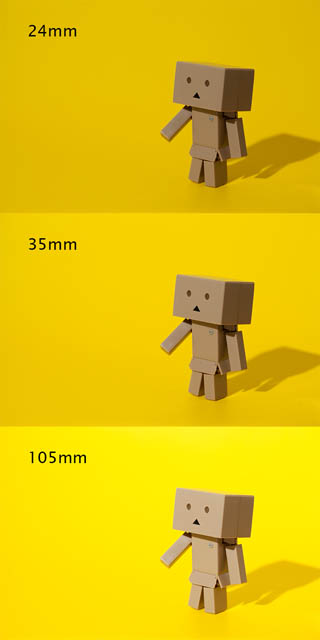
Flash in fixed position at 1/16th power for all shots. As the flash is zoomed in, it creates a narrower, more focused beam of light, producing a brighter image without adjusting the flash power at all. (The camera was in a fixed position using a 100mm lens for all shots - the only difference between each shot is the zoom setting on the flash).
In a similar way, a flash with a zoom head can often cover wider focal lengths than a flash without one. If using a no-zoom flash when shooting with a wide-angle lens, you may find that the edges of the image are much darker than the center. This is because the flash doesn't cover such a wide field of view. Whereas with a zoom flash, you can just zoom the flash out so it covers the wider field of view.
Now, you can get any flash to cover a wider field of view by adding a diffuser to it. However, the diffuser uses up light, and is also likely to spread the light out over a wider area than your lens covers, wasting precious light. With a zoom head flash, you can just zoom the head to the focal length of the lens you're using. (You don't have to actually set the zoom yourself - in most cases the camera will zoom the flash to the appropriate setting automatically).
As well as getting as much power out of your flash as possible, a zoom head is also useful if you want to create a spotlight effect. If you're shooting with a wide-angle, but have the flash zoomed in, then the flash will only illuminate a small part of the scene. Similarly, if you're using the flash off-camera, you can zoom the flash in, then place it close to your subject to hit your subject with a narrow beam of light. This can be very useful for creating dramatically lit images.
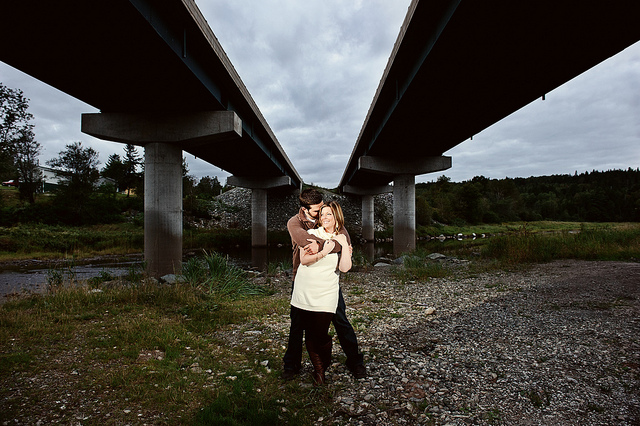
melanie+justin by Sean McGrath on Flickr (licensed CC-BY) - shot at 24mm with flash zoomed to 200mm to highlight just the subjects
You can create a similar effect using a snoot or grid on a flash without a zoom head, but both will cause light loss compared to a flash zoomed in.
Sync sockets
Some speedlights feature a sync socket that allows connecting the flash up to an external trigger when used off-camera. This could be a camera, another flash, a radio trigger, an optical trigger, or even a sound trigger.
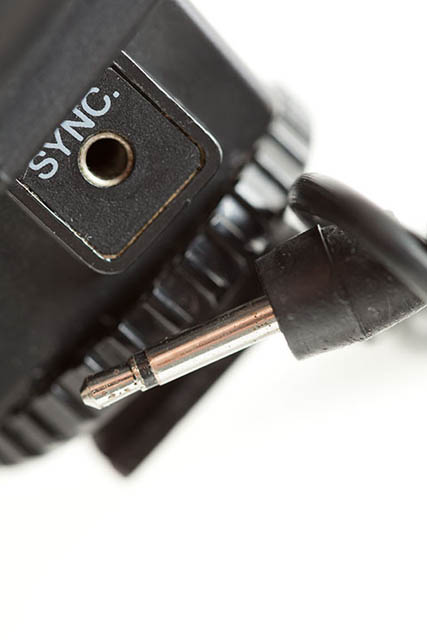
The most common socket is a PC sync socket. Most trigger devices use either a PC sync or shoe connection. Some speedlights feature a 2.5mm socket, or in some cases a proprietary socket of some sort.
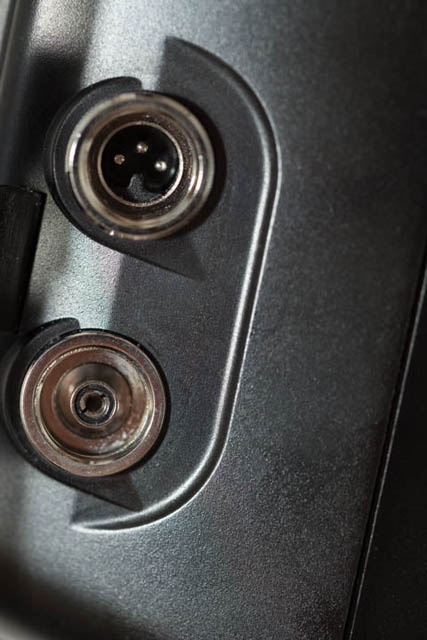
Nikon proprietary sync port (top) and PC sync port (bottom)
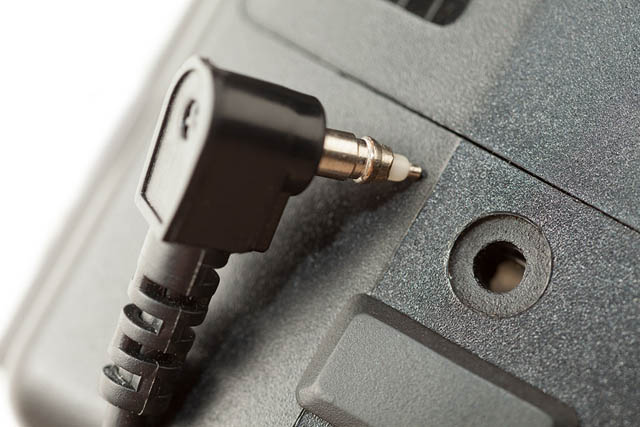
Vivitar proprietary sync port and plug
While a sync port (particularly a PC sync port) can be useful to have, you can always add a sync port to a speedlight through an adapter that attaches to the speedlight's hot shoe. And many triggers are available in versions that attach to the camera's hot shoe, rather than needing a sync cable.
Unless you already own, or are planning to purchase, triggers that use a sync port to connect to the flash, then a sync port is much more of a nice-to-have than an essential feature.
AF assist light
Many TTL speedlights feature an AF assist light, which can help your camera autofocus in low light. The AF assist light fires a beam of light towards your subject, the extra light helping your camera focus quickly and accurately.

The AF assist light is often hidden behind a piece of translucent red plastic on the front of the flash. Note that some speedlights have a similar area with only a light sensor behind it, so check the flash specifications if you want to be sure it includes an AF assist light.
Even if your camera already features an AF assist light, it can still be useful to have the feature on your flash. The AF assist light on a speedlight is typically quite a bit stronger than that found on most camera models.
Video light
Video records at around 30 - 24 frames per second, so for a flash to be useful for video, it would need to fire that many times per second. No flash can do this, and even if they could, due to the way video is recorded the flash wouldn't necessarily light the whole frame. Instead a constant (always on) light source is needed for video.
Some speedlights feature a built-in video light that provides a constant light source for when you want to record video in dim lighting. This is not a particularly powerful light - it's no substitute for a proper video light.

The Canon 320EX is an example of a speedlight with a built-in video light.
However, if you want a quick and handy video light, such as to record some behind the scenes video during a shoot, it can come in useful. Similarly, if you want to travel light, it provides you with a video light at very little size and weight cost compared to just carrying a standard speedlight.
If you're quite into your video though, you'll want to use a more powerful dedicated video light, rather than relying on a 'bonus' feature of a speedlight flash.
I hope you've found these articles on flashgun features useful so far. In the next article we'll look at the color temperature of the light the flash outputs, the duration of the flash (how long the burst of light lasts for), and accessories included with many flashes. We'll cover what sorts of photography these features are useful for, and also where they're not so important.
