Photography Basics – Exposure

with 3 comments

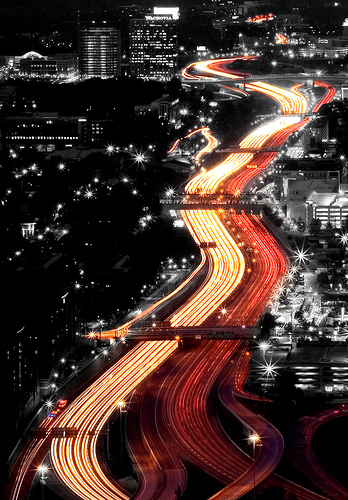
Exposure in photography refers to how bright or dark an image is. An under-exposed photo is one that is dark, while an over-exposed photo is one that is bright.

Most people tend to use an auto exposure mode on the camera, where the camera works out the exposure for us. For example, the Aperture Priority, Shutter Priority, Program, Intelligent, and Scene modes. But even if you rely on an auto exposure mode, it is still helpful to have a good grounding in how exposure works, and how the different exposure settings work together.

Read the rest of this entry »

Written by Discover Digital Photography

October 18th, 2012 at 9:02 am

How to take tack sharp photos

without comments

Capturing sharp images is something that virtually every photographer tries to do with every image. Even if only a very slim portion of the image is in focus, we want that part to be sharp, and record as much detail as possible.

Kitten photo taken at f/1.4 to give a shallow depth of field while in-focus portion is sharp
Emily by schani on flickr (licensed CC-BY-SA)

The only exception I can think of is some portrait photography, where a soft focus filter may be used to give a soft and dreamy look.

To get tack sharp photos, there are a number of things you can do:

Read the rest of this entry »

Written by Discover Digital Photography

October 11th, 2012 at 7:56 pm

Get It Right In-Camera

without comments

With today's modern cameras and image editing software, there is a lot we can do to rescue a poor photo. Images can be brightened considerably without ruining the image if the exposure was wrong. If we didn't pay attention to a messy background, we can fix it in software using the clone tool or content-aware fill.

But we mustn't let ourselves become "lazy photographers. Fixing a photo in software can take a lot longer than just spending a little more time to make sure we get it right in-camera. In this article I'll share a few points that you should consider when taking the photo, rather than trying to fix them later.

Read the rest of this entry »

Written by Discover Digital Photography

October 4th, 2012 at 3:41 pm

How to create a selective color photo

without comments

A selective color photo is one where part of the image is in color, while the rest of the image is black & white (or heavily desaturated). Selective color photos work very well to draw the viewer's attention to the part of the image that is in color.

Light trails along the highway selective color photo
Highway Insomnia by Nrbelex on flickr (licensed CC-BY-SA)

Read the rest of this entry »

Auto Bracketing Explained

without comments

Auto bracketing is a feature found on most cameras that allows you to take multiple photos in quick succession with a single parameter changed between each shot. Normally auto bracketing refers to exposure bracketing, but it can also be used for white balance bracketing.

In this article we'll look at both exposure bracketing and white balance, what they do, and when they can be useful.

Read the rest of this entry »

Ensuring your photos have a clear concept

without comments

A good way to create a strong photo is to make sure that the photo has focus. I don't mean 'focus' as in the photo should be in focus (though that is normally a good idea!), but rather that there is a clear message or theme to the photo.

A good photo should convey a concept or feeling that ideally can be summed up in one word. Though an image may have several different single words that can be used to describe it. For example, the photo below could be described as 'relaxing', 'serene', 'calm'.

Chillin' in Mono Lake
Chillin' in Mono Lake by *~Dawn~* on flickr (licensed CC-BY)

Read the rest of this entry »

Written by Discover Digital Photography

September 21st, 2012 at 8:52 pm

What is White Balance?

without comments

Different light sources produce light with different colors. For example, fluorescent lighting often has a green tinge, while tungsten lighting is a warm amber. Our eyes don't tend to notice the color of light too much, as they automatically correct for any color casts to a certain degree.

But a camera records what it sees, and this is where setting the correct white balance becomes important. If your camera is set to daylight color white balance, then you shoot under tungsten lighting, you'll find the resulting images have a strong orange color cast.

Photo lit with a standard indoor energy saving CFL bulb and white balance set to daylight

When you set the correct white balance setting on the camera, it modifies the camera's color response. It works in much the same way as using the curves tool in Photoshop to adjust color. The white balance setting determines the overall balance of colors in an image, to result in an image with a neutral color cast.

Read the rest of this entry »

Written by Discover Digital Photography

September 18th, 2012 at 9:05 am

Photo Tip – How To Create A Three Light Portrait Photography Set, With No Lights!

without comments

Author: Dan Eitreim

In today's portrait photography photo tip we are going to wrap up our discussions of the three light set with a quick review and an example of how to build a three light set - with no lights! Just because you don't have any studio lights, doesn't mean you can't shoot quality images.

Here is a quick review... Most good portrait photography requires three lights.

Read the rest of this entry »

Written by Guest

September 15th, 2012 at 9:12 pm

Visiting a famous landmark? How to take photos that don’t just look like vacation snaps

without comments

When you're away on vacation, you want to take great photos to record your trip and the interesting places you visited. But if you're planning on visiting a famous location, how do you avoid your photos coming out like everyone else's vacation photos?

Well, having your photos of a famous landmark look unlike anyone else's photos of the same location is going to be very difficult, and perhaps not such a great idea anyway. Even if you do get a different photo, will it be any good? Instead, why not aim to have your photos looking like the best existing photos of that location?

Grand Canyon sunrise
Grand Canyon Copyright by Moyan Brenn on flickr (licensed CC-BY-ND)

Read the rest of this entry »

Written by Discover Digital Photography

September 12th, 2012 at 7:34 pm

Single vs. Continuous – Camera Drive Modes Explained

without comments

On the vast majority, if not all cameras, when you press down the shutter button, the camera will just take a single photo. However, you can change this behavior by using the camera's drive mode setting.

Drive Mode button on camera

The drive mode lets you change the rate at which the photos are taken. In this article we'll look at the different drive mode settings, and when you are likely to find them useful.

Read the rest of this entry »

Written by Discover Digital Photography

September 9th, 2012 at 1:16 pm